

This is Part 2 of a series on getting your EBITDA out of QuickBooks, from a number you calculate by hand to a live dashboard you can pull any time.
- What EBITDA is and how to get it from QuickBooks
- Connecting and testing the QuickBooks API, you’re here.
- Building your own EBITDA dashboard
- Sharing your dashboard with your team
Part 1 ended with a fair question: are we really going to pull a P&L, hunt for four line items, and prompt an AI by hand every single quarter? No. QuickBooks Online has an API, a secure doorway that lets software (not just a human clicking around the browser) read your accounting data on request. This part is about getting that doorway open and proving, with a real request and a real response, that it works. If “API” is still a fuzzy word, our What Is an API? explainer covers the two-minute version before you continue.
One note on terms before we start: QuickBooks doesn’t hand you a single “API key” the way some tools do. It uses OAuth 2.0, which means a few different credentials work together instead of one. We’ll call out each one as it shows up.
Step 1: Create your free Intuit Developer account
Go to developer.intuit.com and sign up, or sign in with an existing Intuit account (QuickBooks, TurboTax, or Mint all work). This is free, you’re not creating a QuickBooks subscription, you’re creating a developer account that can talk to QuickBooks.
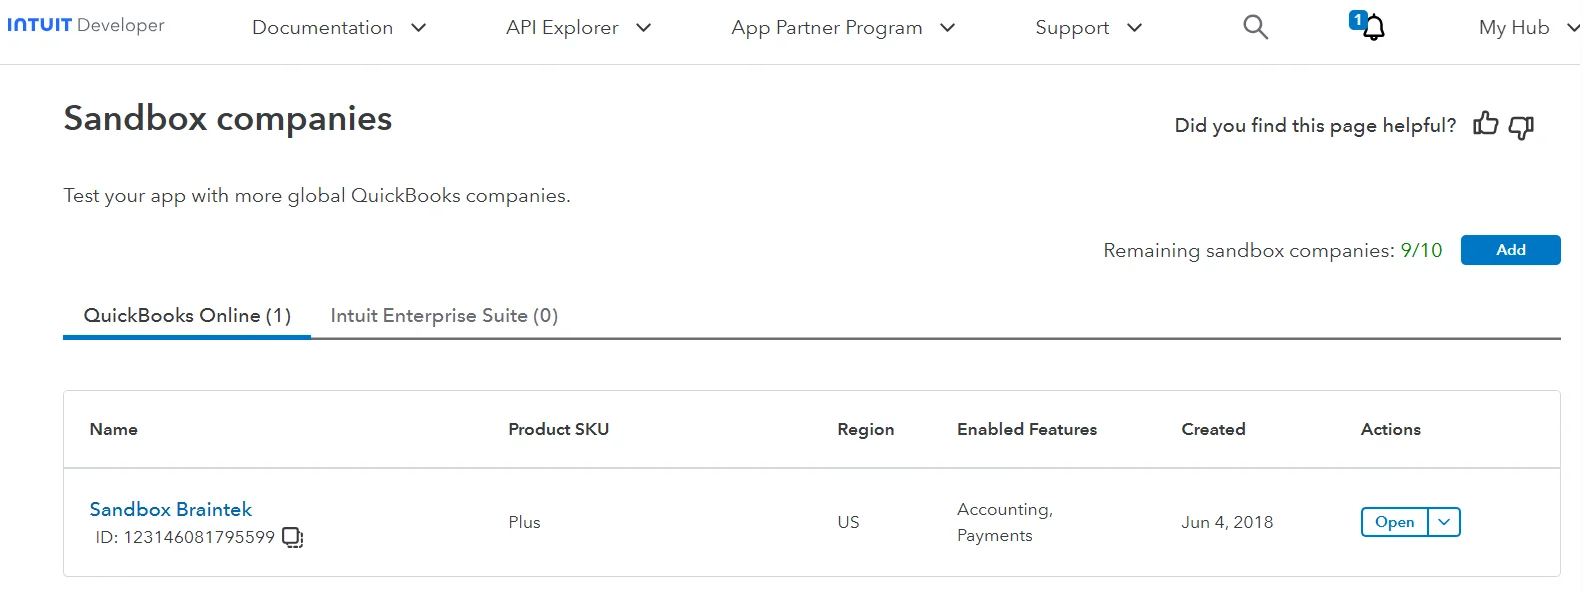
The moment you sign up, Intuit automatically provisions a sandbox company: a fake QuickBooks Online company preloaded with sample customers, vendors, invoices, and a Profit and Loss statement. You get up to 10 of these. Every step below happens against the sandbox, so there’s no risk to real data yet.
Step 2: Create an app
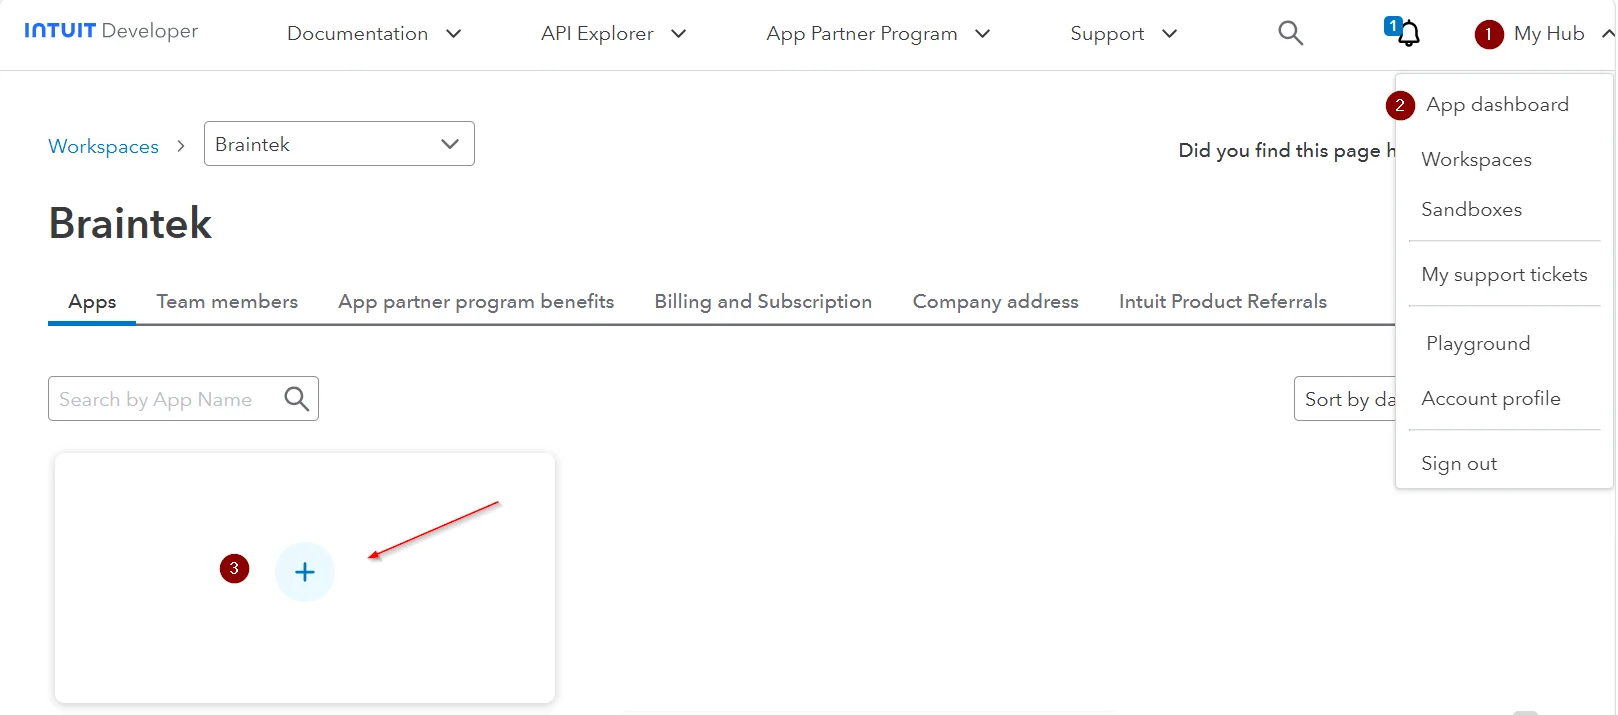
From My Hub in the top right, open App dashboard, then click the + tile to create a new app.
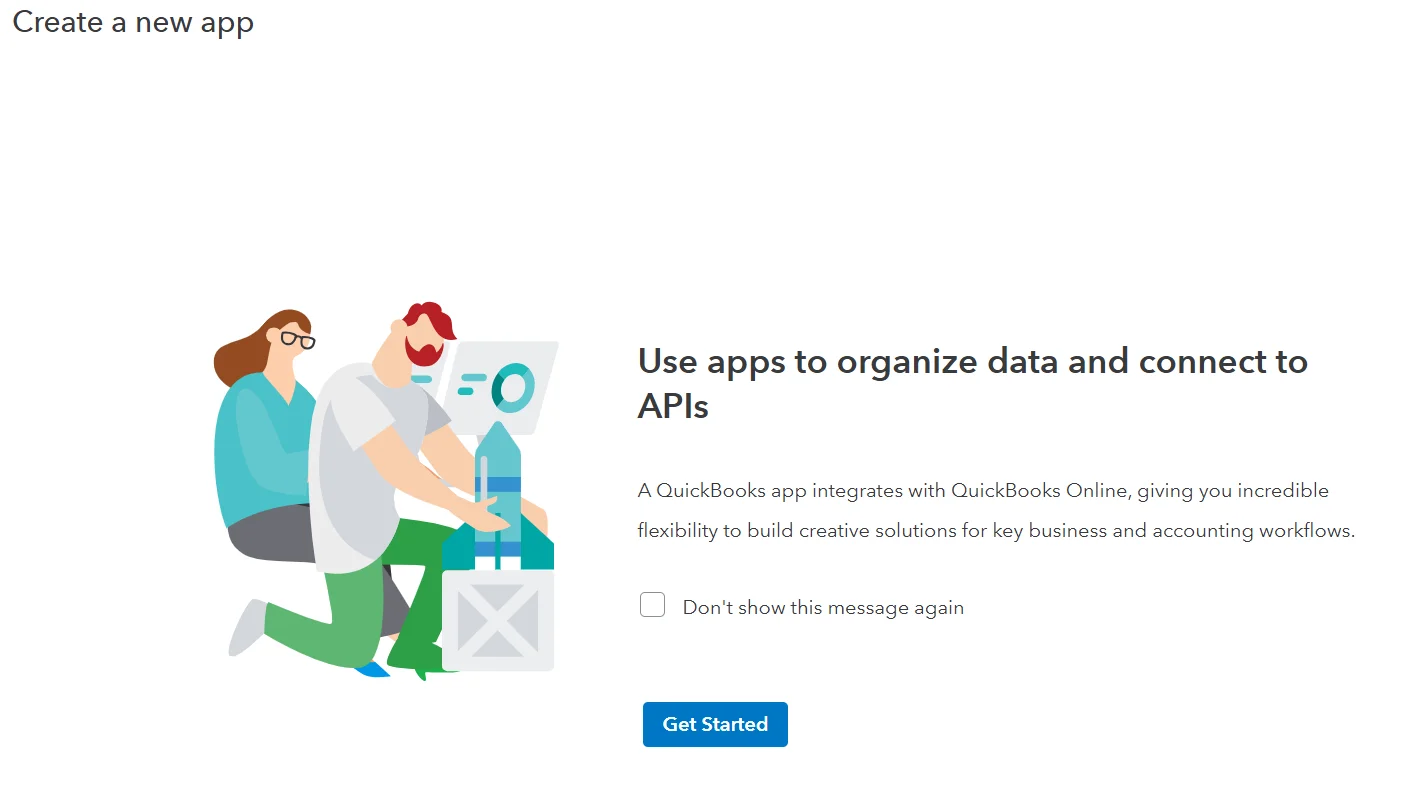
You’ll land on an intro screen explaining what apps do, click Get Started.
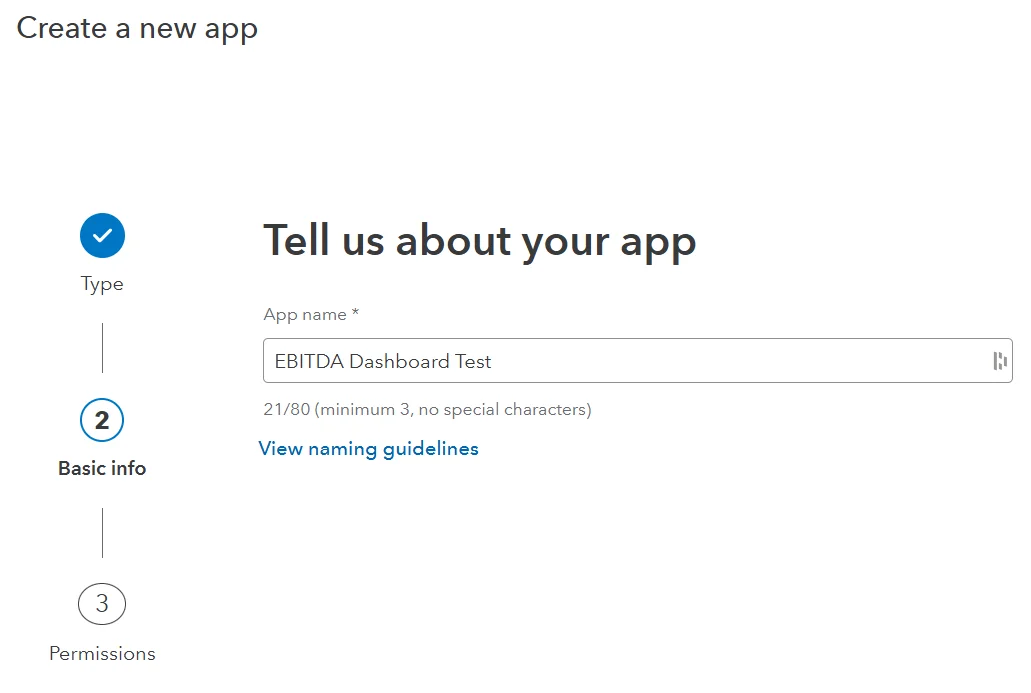
Give the app a name. This is internal, only you see it, so something like “EBITDA Dashboard Test” is fine.
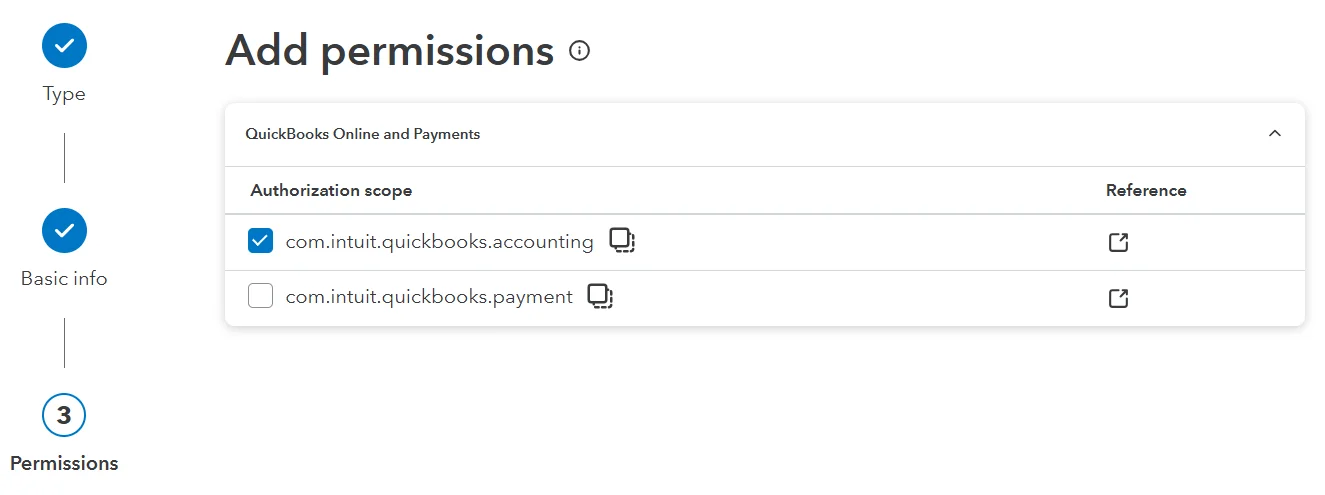
Then pick the scope your app needs. For pulling accounting data and reports, that’s com.intuit.quickbooks.accounting.
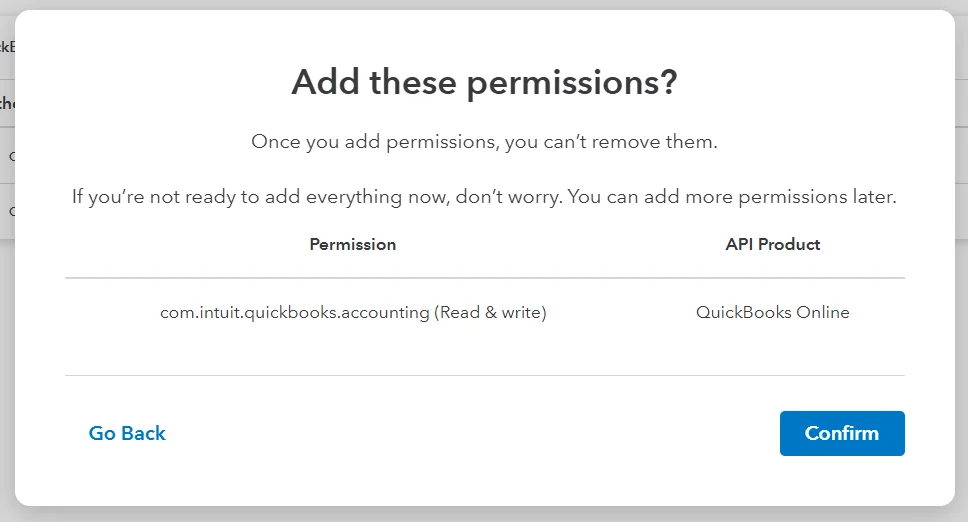
One thing worth slowing down for: Intuit will ask you to confirm, and the confirmation screen says plainly, “Once you add permissions, you can’t remove them.” You can always add more scope later, but you can’t walk one back, so only check what you’re actually going to use.
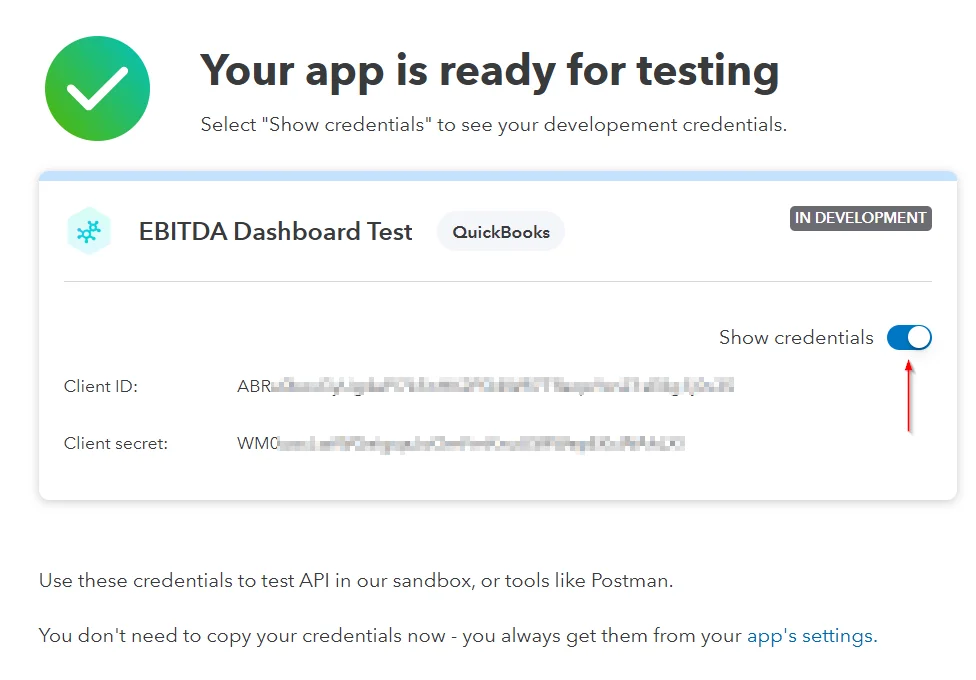
Confirm, and your app is ready.
Step 3: Get your Client ID and Client Secret
Right after creating the app, flip the Show credentials toggle (see the screenshot above) to reveal your Client ID and Client Secret. You don’t have to grab them this second, that same screen tells you as much, they’re always available again later from Keys and credentials in the left-hand menu of the app’s overview page.
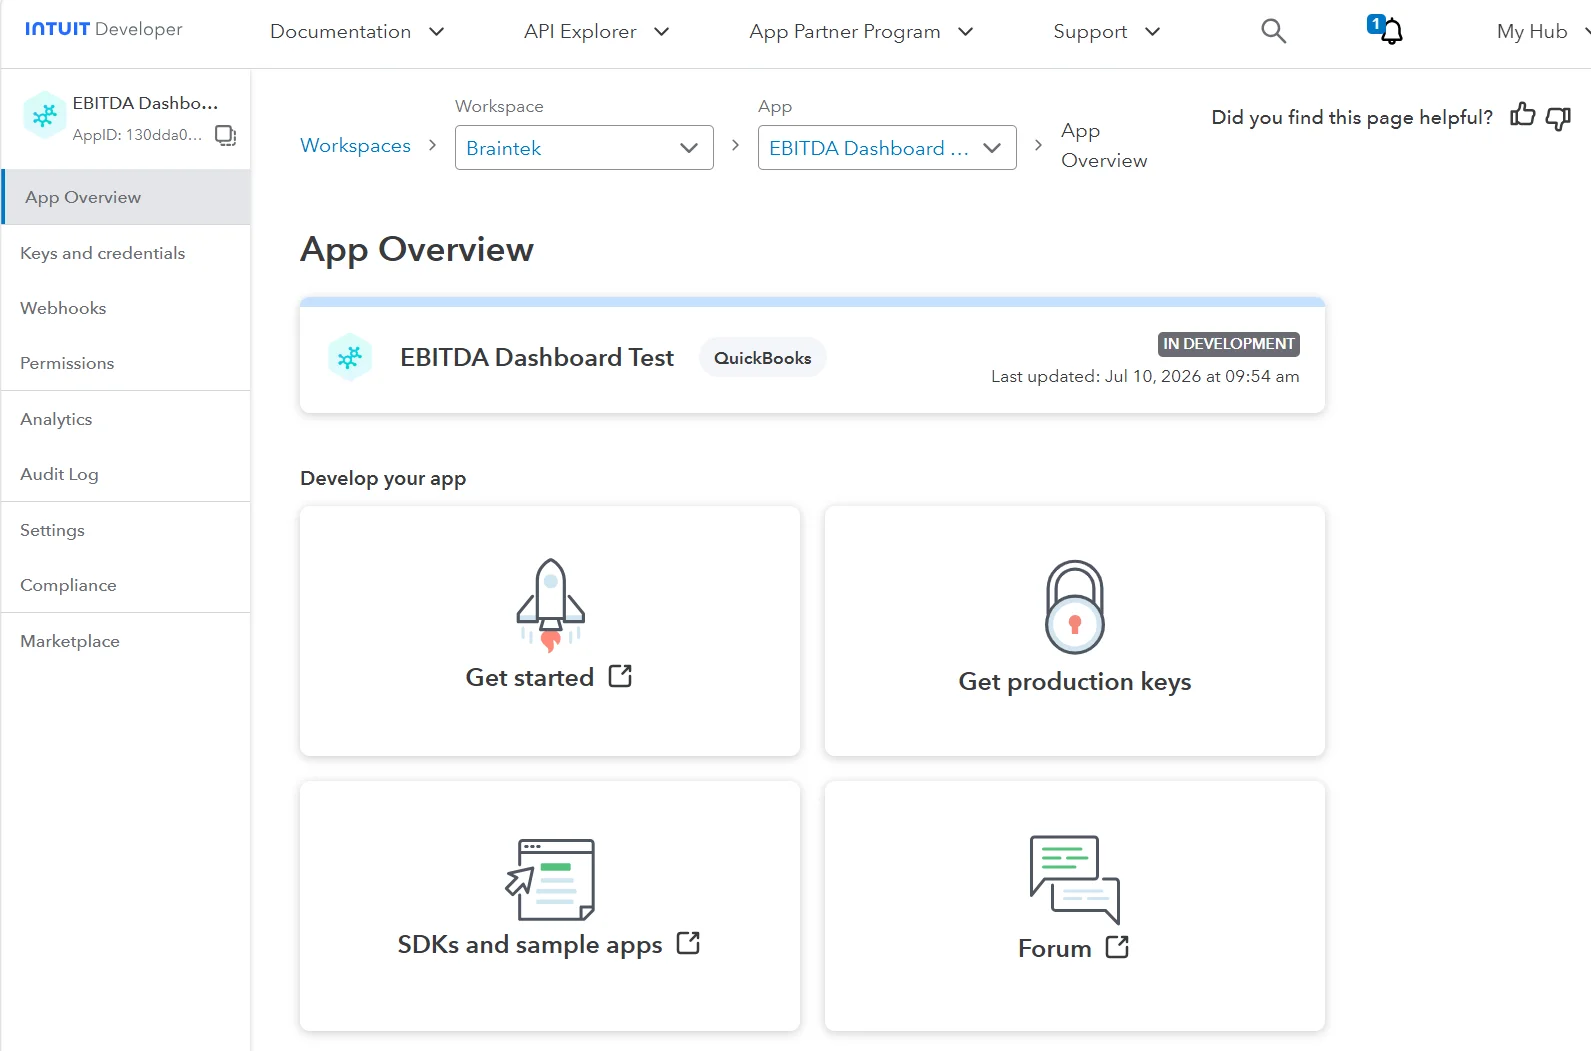
Two things worth knowing about these credentials:
- Client ID identifies your app to Intuit. Not secret on its own, but still specific to you.
- Client Secret is the one that actually proves requests are coming from your app. Treat it like a password.
Intuit gives you two separate sets: Development keys (for the sandbox, what we’re using here) and Production keys (for a real, live QuickBooks company, that’s the “Get production keys” tile above). They are not interchangeable, development keys will not work against a live company, and production keys will not work in the sandbox.
If you need to save these somewhere while you set up Postman in the next step, use a password manager or a secure note, not a plain, unencrypted text file sitting in a shared folder, that’s exactly the kind of file that ends up copied somewhere it shouldn’t.
Step 4: Test the connection in Postman
Intuit publishes an official Postman collection for the QuickBooks Online Accounting API, which is the fastest way to get your first request working without hand-building the OAuth flow yourself.
-
In Postman, find the Intuit Developer QuickBooks Online Accounting API workspace. Open the QuickBooks Online Accounting API collection (there’s a second, separate “Orchestrated API” collection in the same workspace, that’s not the one you want).
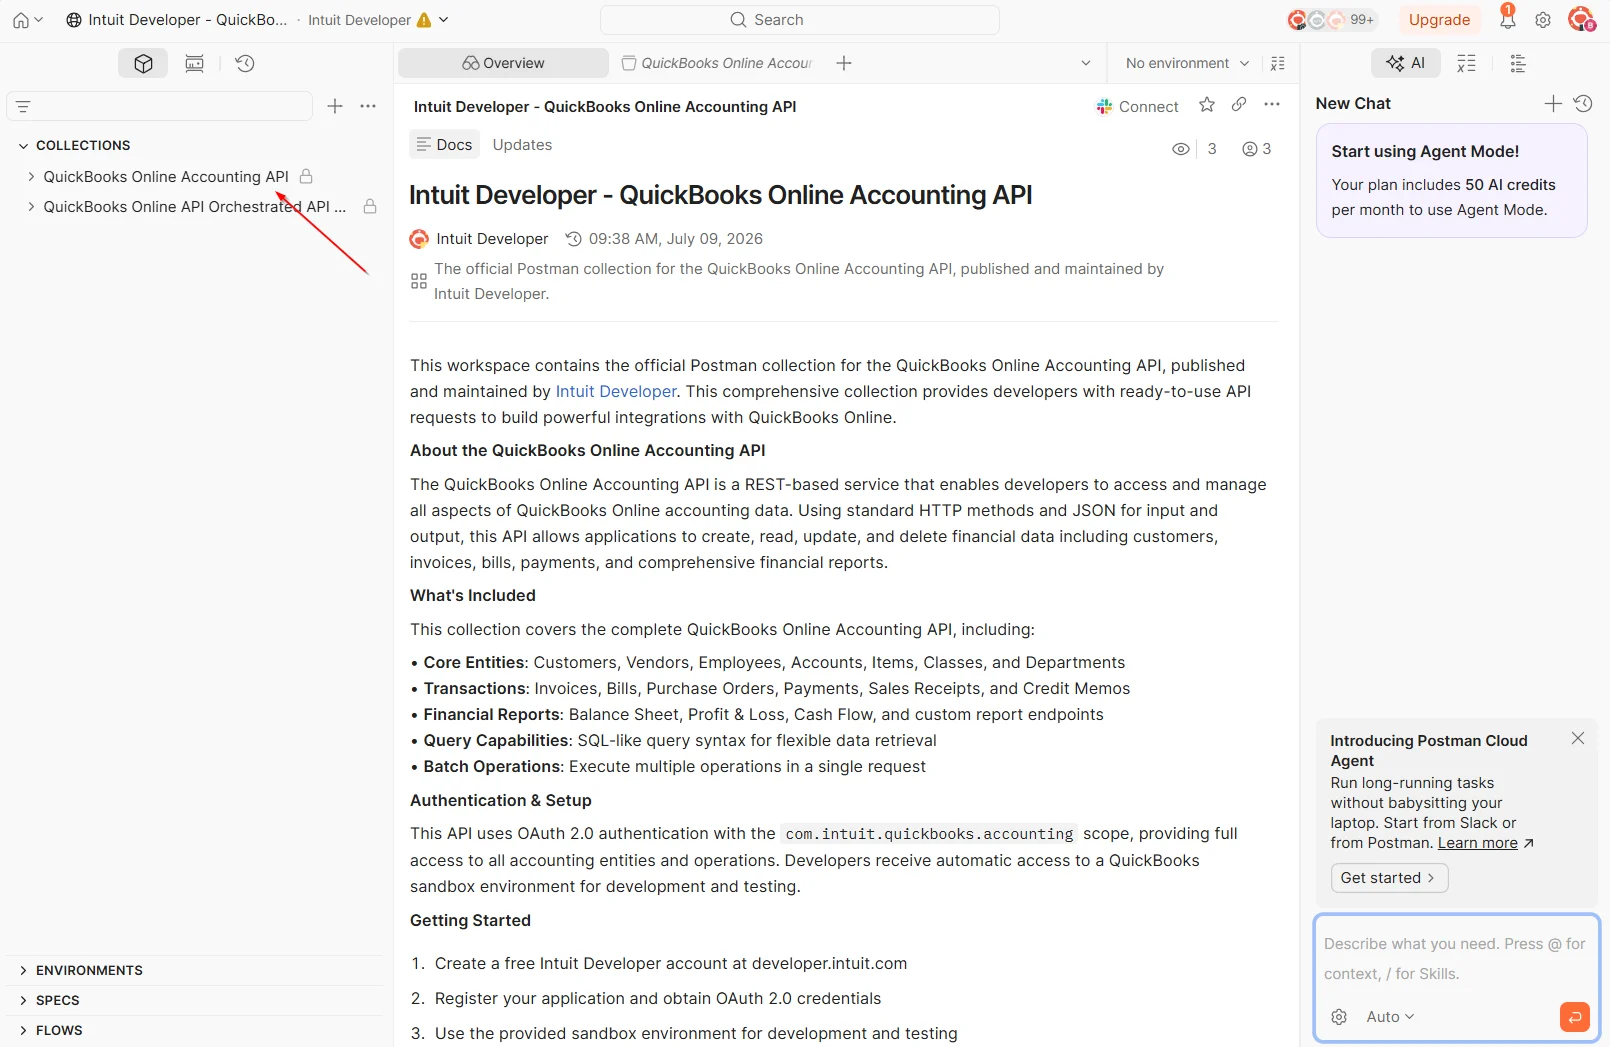
-
You can’t edit Intuit’s copy directly, so Fork it into your own workspace (the ”…” menu on the collection, then Fork).
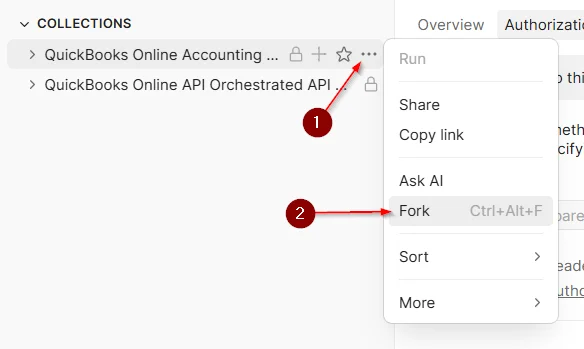
Give the fork a label, pick your workspace, and click Fork Collection.
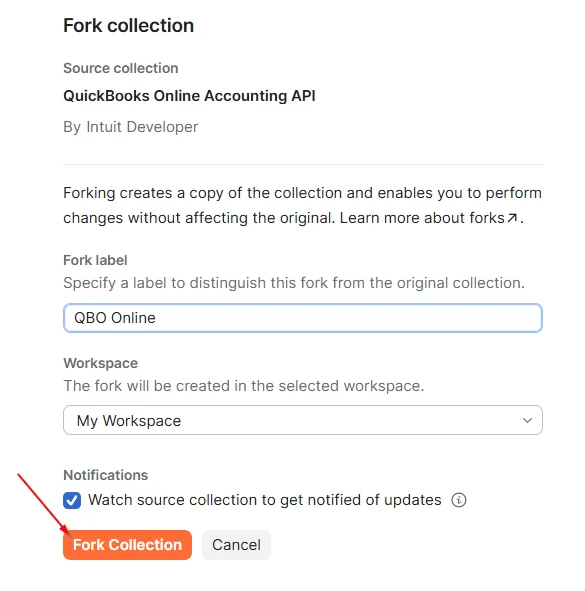
-
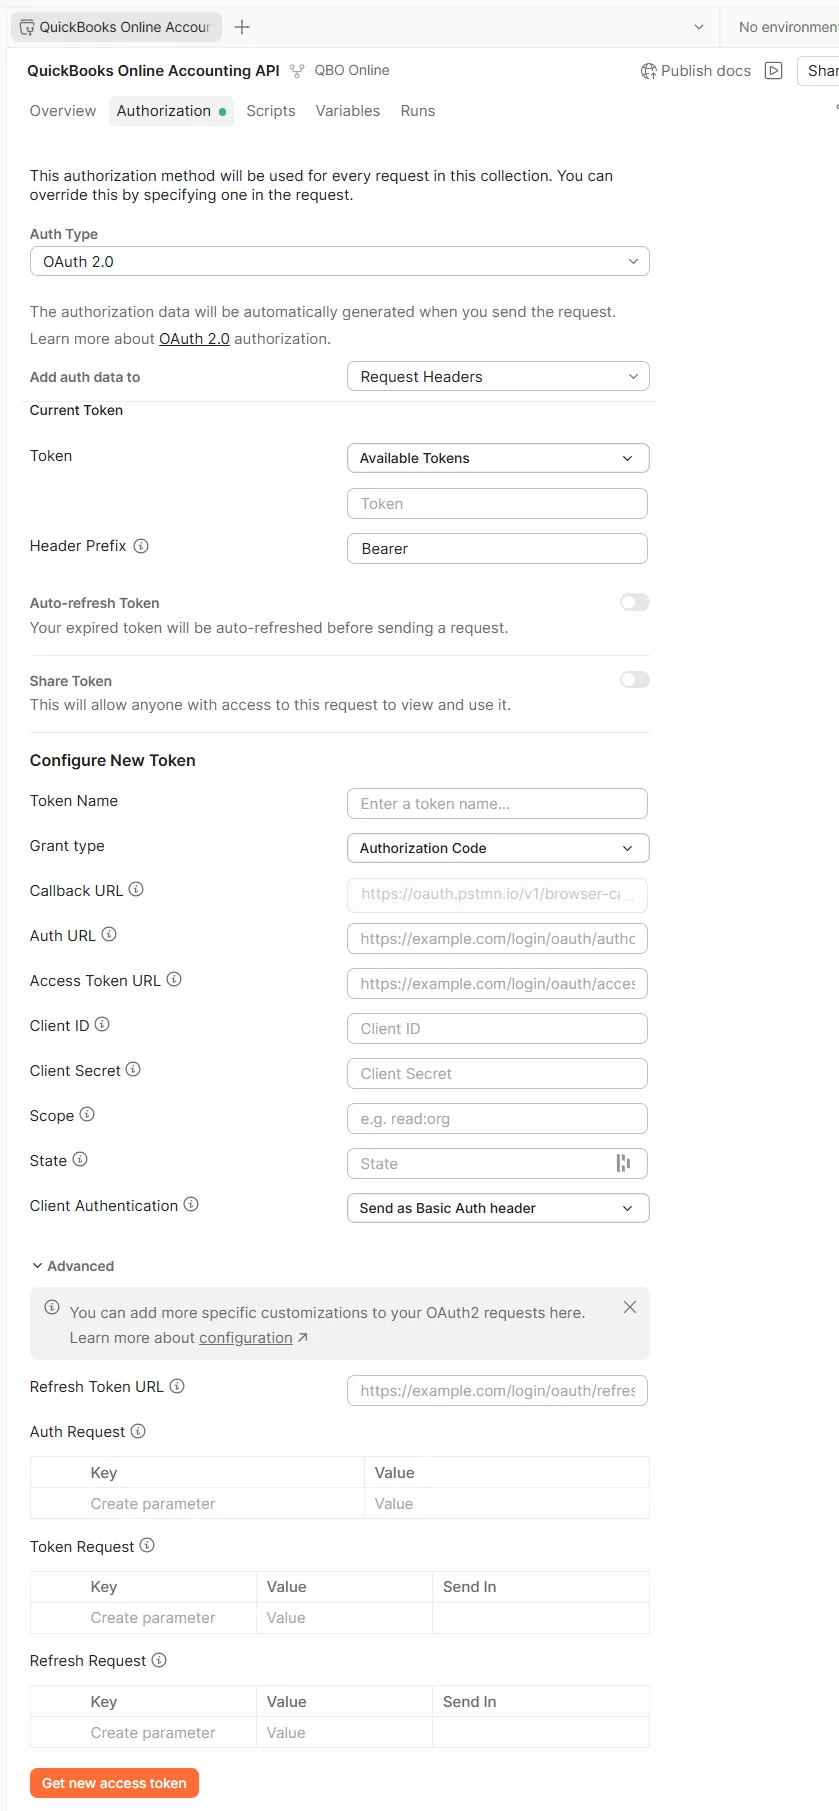
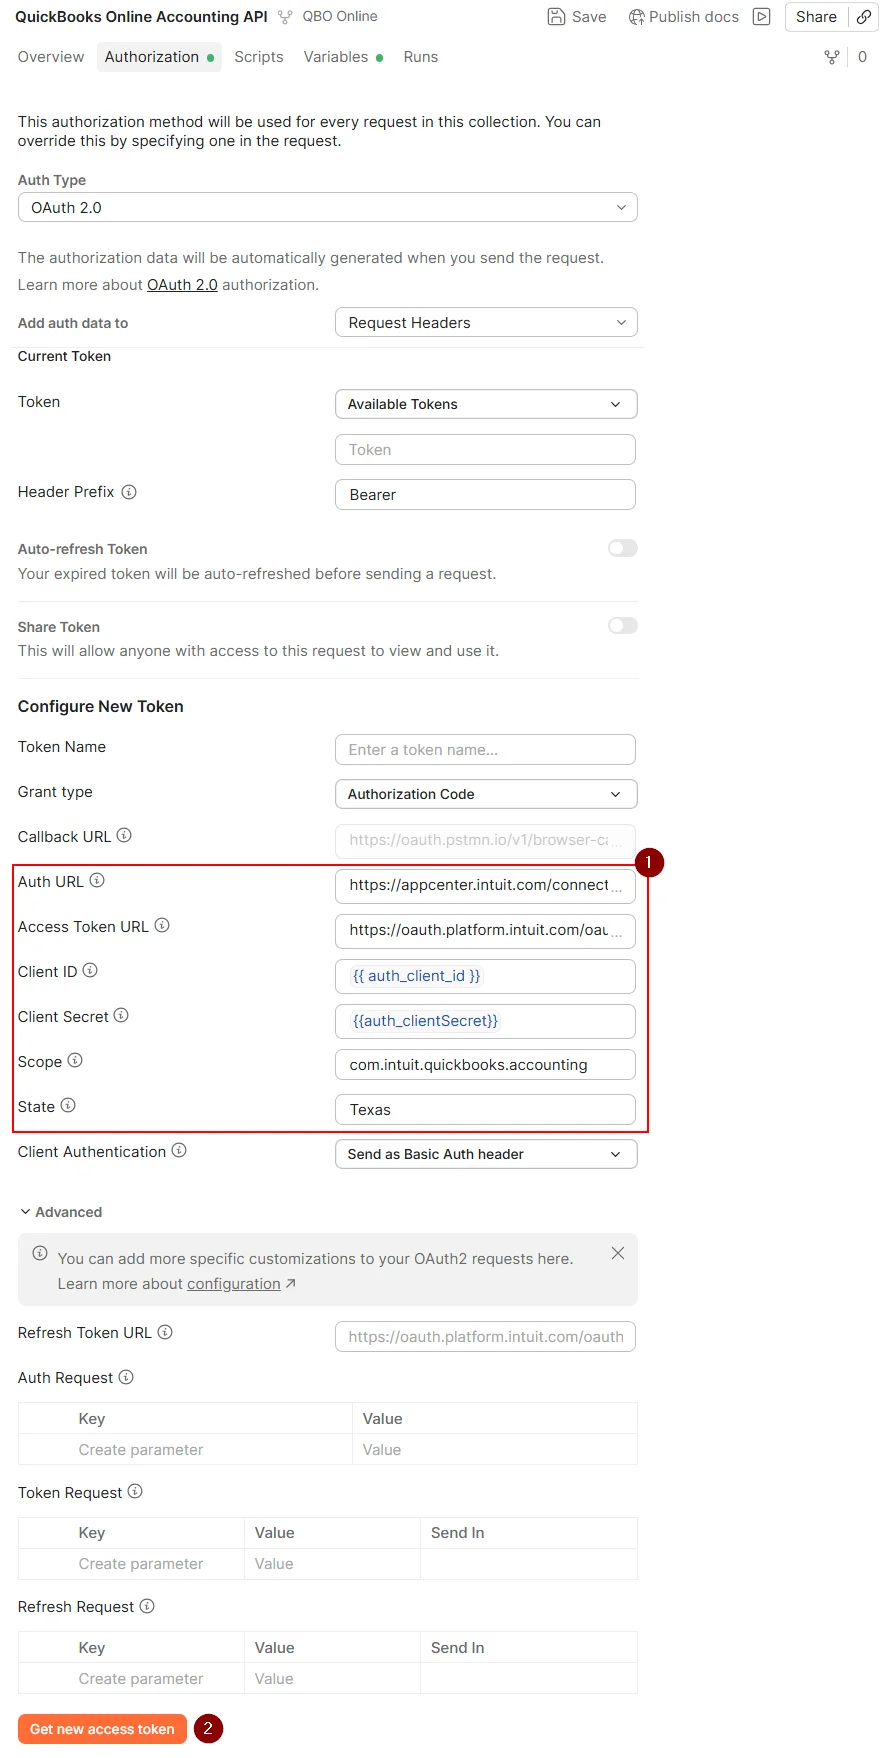
On your forked collection, open the Authorization tab. Under Configure New Token, you’ll see two separate boxes, one labeled Client ID, another labeled Client Secret, directly beneath it. Paste your Client ID from Step 3 into the Client ID box, and your Client Secret into the Client Secret box below it. They’re two distinct fields, not one combined field, don’t paste both into the same box.
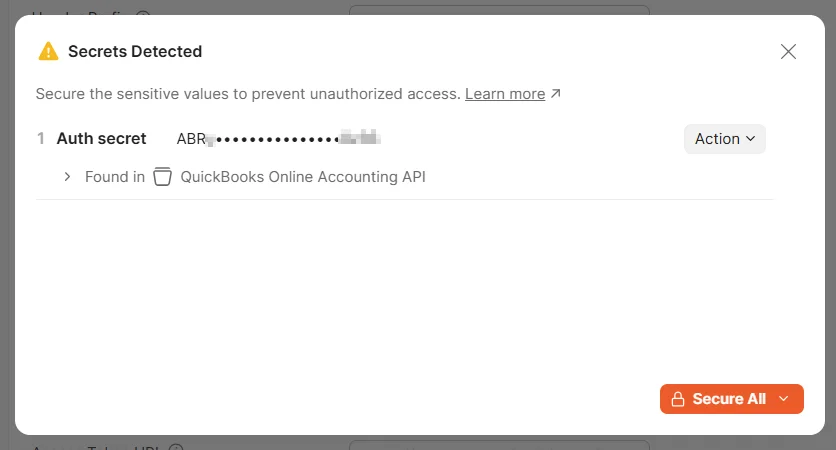
The moment you paste them, Postman notices they look like credentials and shows a Secrets Detected warning, offering to secure them. Click Secure All, this stores them as protected vault variables instead of plain text sitting inside your collection.
Only two fields in this section come pre-set correctly by the collection: Grant type (Authorization Code) and Client Authentication (Send as Basic Auth header), leave both alone, the second one has to match what Intuit expects. Everything else is still blank placeholder text and needs to be typed in by hand:
- Auth URL:
https://appcenter.intuit.com/connect/oauth2 - Access Token URL:
https://oauth.platform.intuit.com/oauth2/v1/tokens/bearer - Scope:
com.intuit.quickbooks.accounting
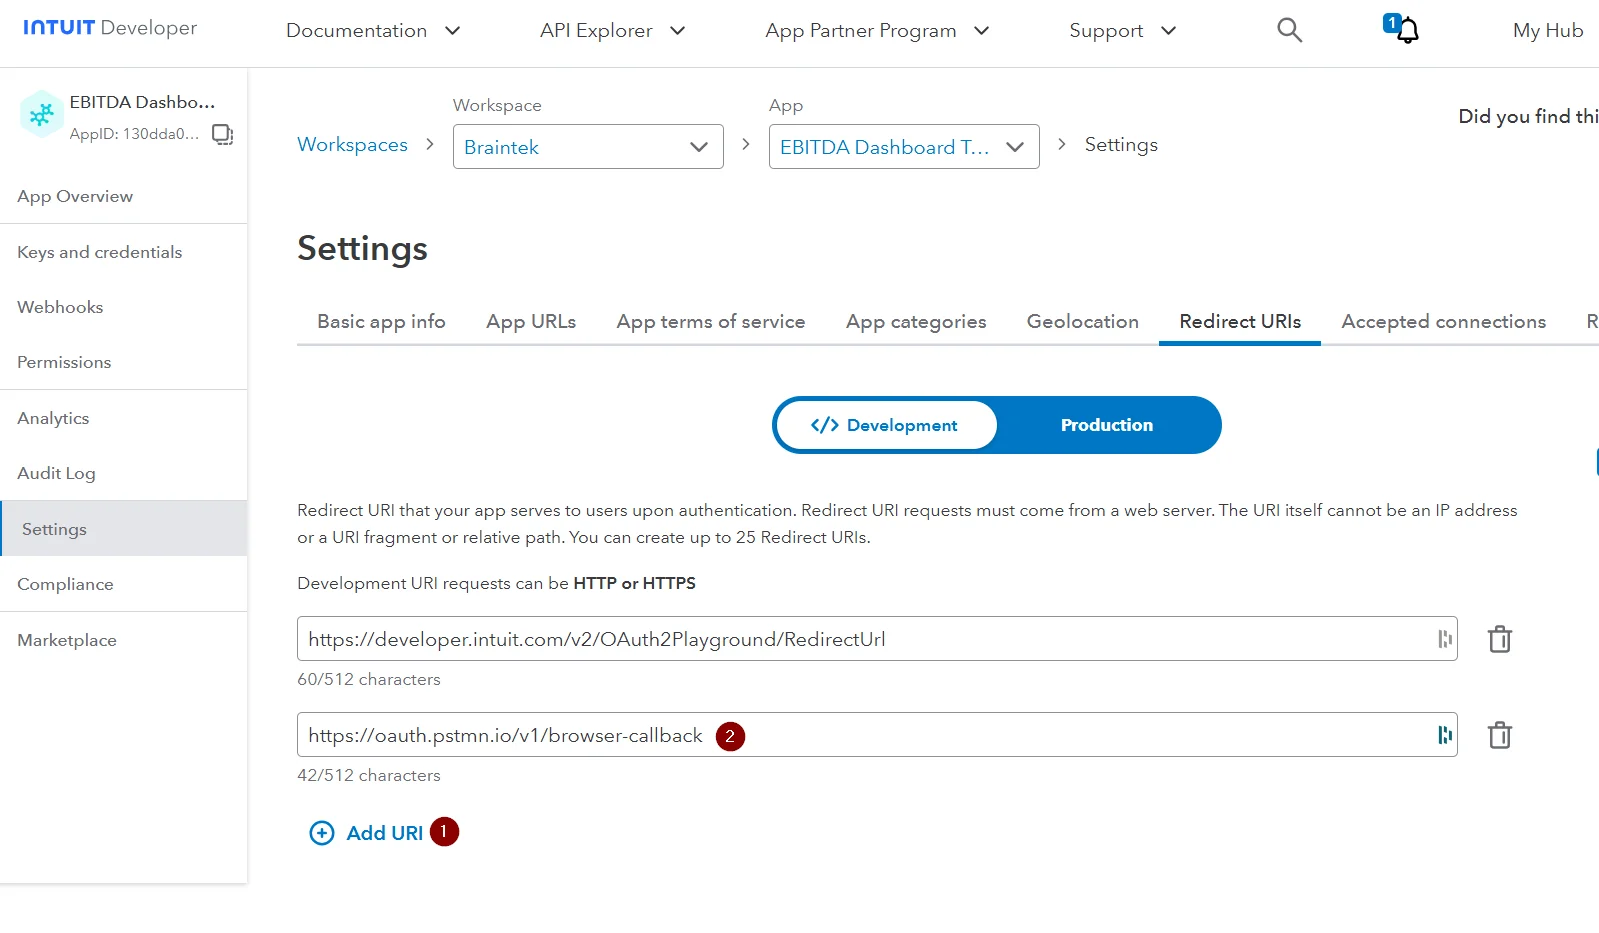
In Postman’s web app, Callback URL is greyed out, you can’t type into it, and you don’t need to. Postman controls it and always sends its own hosted address for you. But that address still has to be registered on Intuit’s side, or Intuit will refuse the redirect. In your app’s left-hand menu, go to Settings → Redirect URIs, make sure the Development toggle is selected (it matches your sandbox Client ID/Secret), then click Add URI and add
https://oauth.pstmn.io/v1/browser-callbackalongside whatever default entry is already there (don’t delete it, just add a second one).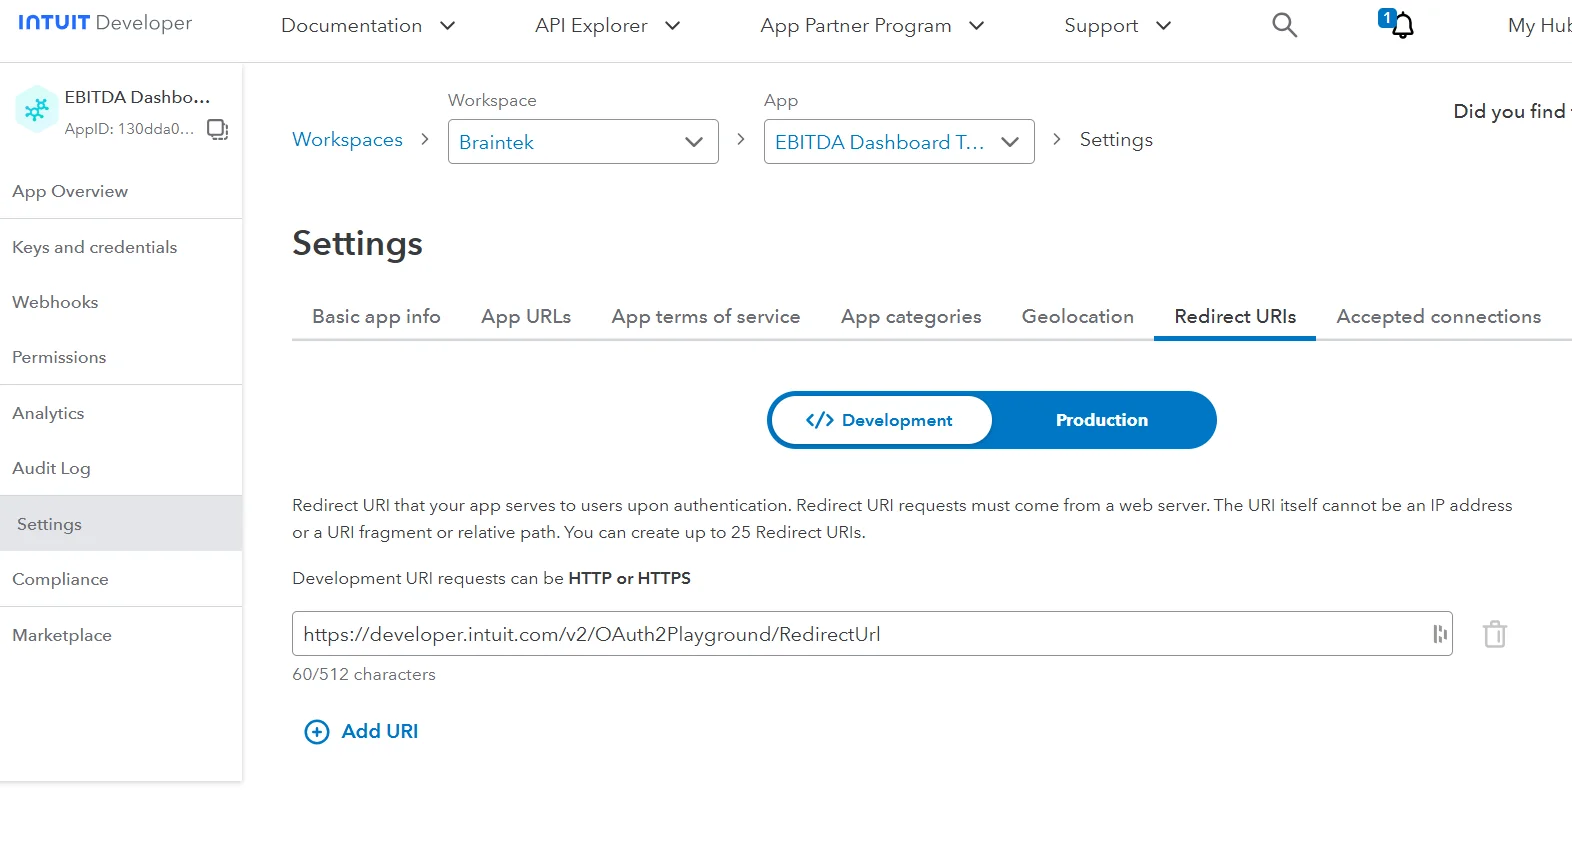
One field that’s easy to skip and will break the connection if you do: State. Intuit requires this parameter to be present, it’s a CSRF-protection value, and it doesn’t need to say anything meaningful, just can’t be blank. Type anything into it (a word, a random string, doesn’t matter). Skip it and you’ll get “the state query parameter is missing from the authorization request” when you try to connect.
- Auth URL:
-
Click Get New Access Token. Postman opens a browser window where you log in, then pick which sandbox company to connect (you’ll only have the one, “Sandbox [Your Company Name]”).
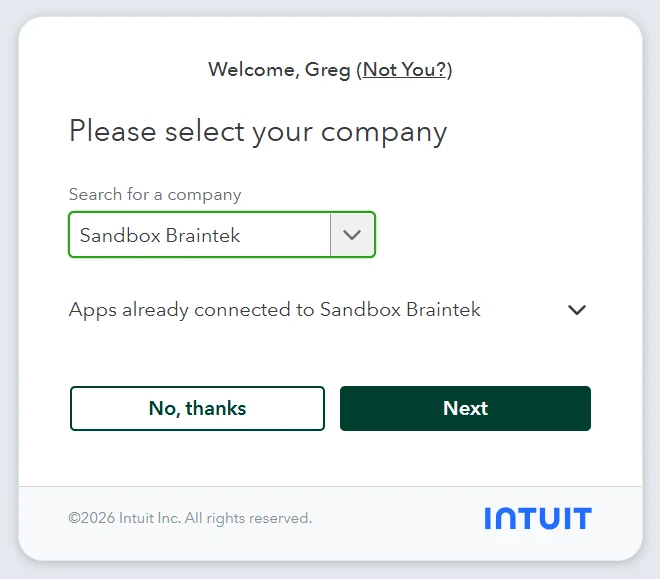
Then you’ll land on the actual consent screen, the same one a real customer would see if they connected your app to their live QuickBooks. Click Connect.
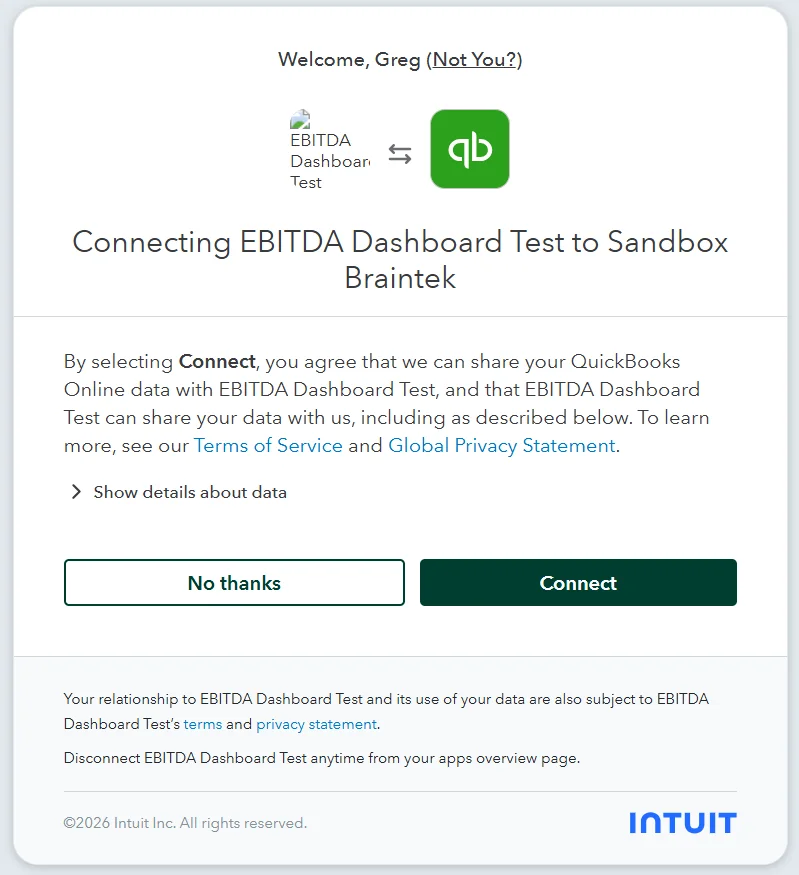
-
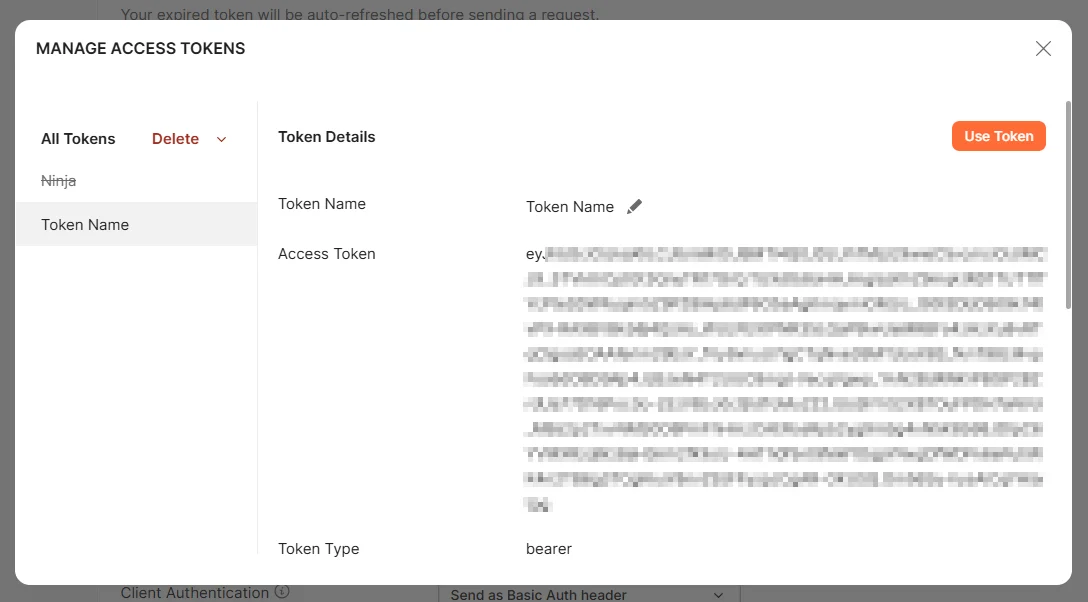
Postman hands back a Manage Access Tokens window with your new access token (short-lived, sent on every request) sitting under Token Details, blurred here the same way you should blur it in any screenshot you take. Click Use Token to apply it to the collection. Postman also generates a refresh token behind the scenes (used to get new access tokens later without logging in again) and captures your Realm ID, QuickBooks’ name for your company’s unique ID, you’ll need it in every request URL.
Step 5: Pull the report you actually need
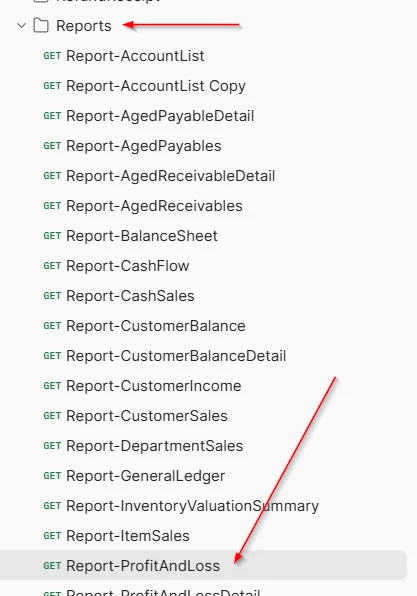
The collection you forked already has the request built. In the sidebar, open the Reports folder and click Report-ProfitAndLoss.
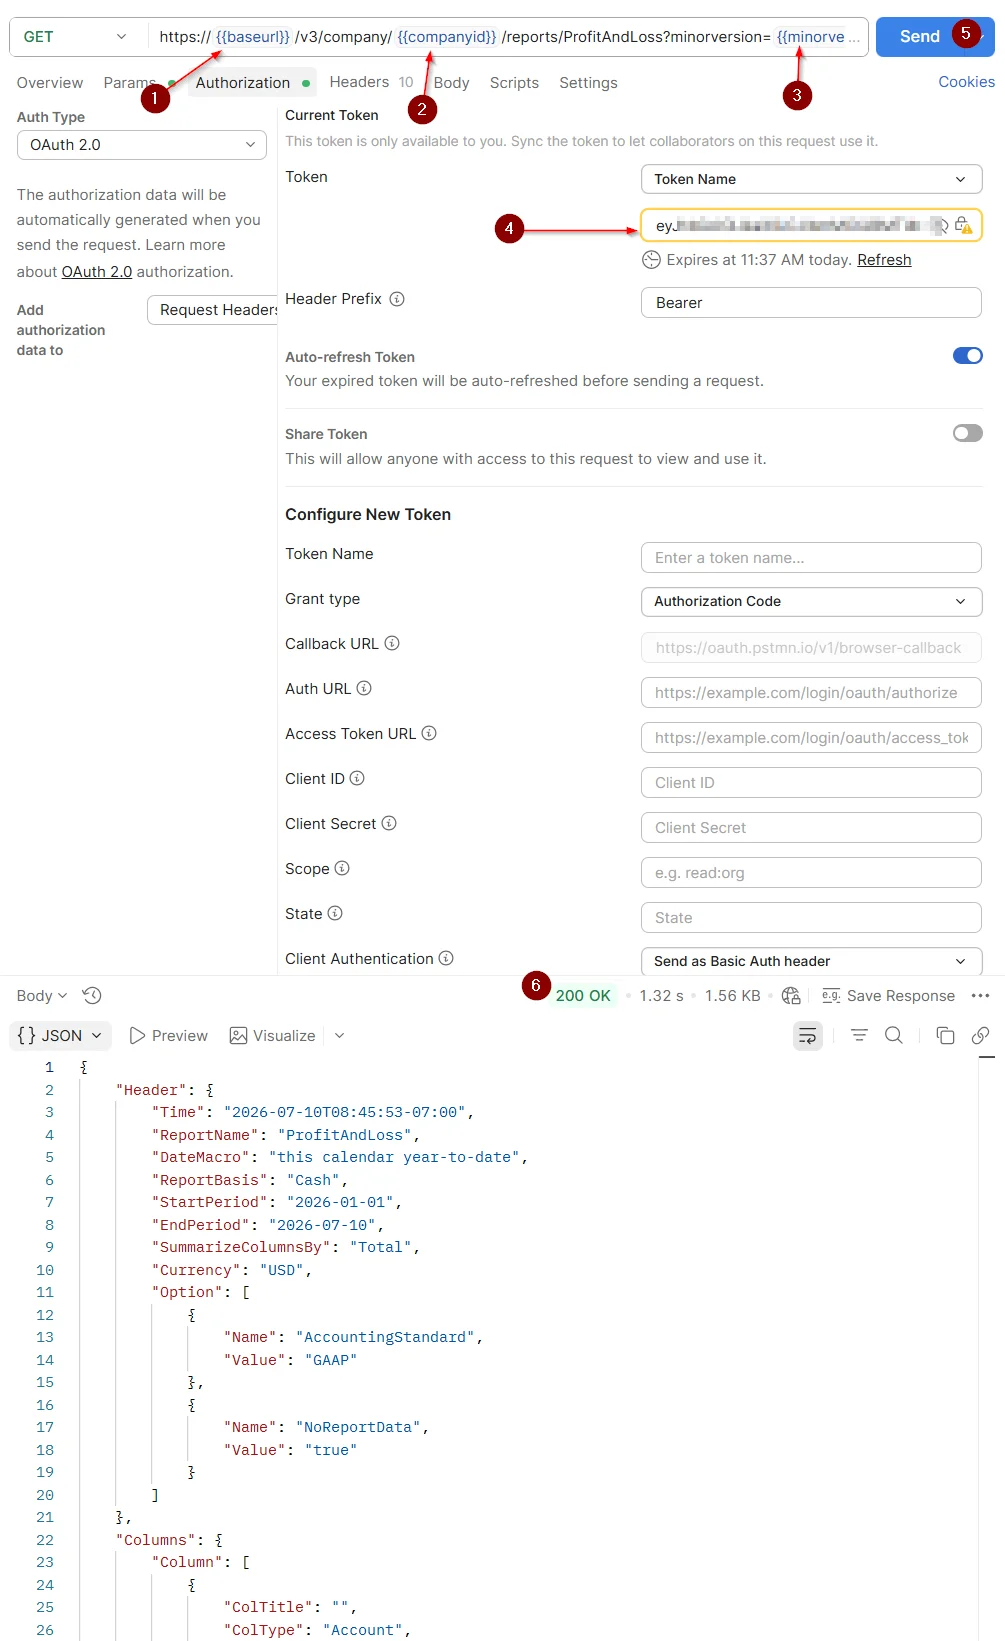
Its URL is built from three collection variables, not typed in directly: {{baseurl}}/v3/company/{{companyid}}/reports/ProfitAndLoss?minorversion={{minorversion}}. Before you can send it, those three need real values:
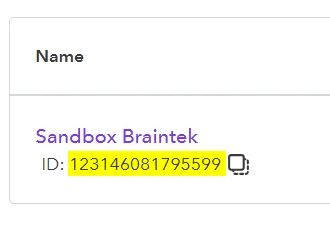
baseurl→https://sandbox-quickbooks.api.intuit.comcompanyid→ your Realm ID (the same one from My Hub → Sandboxes we used earlier, the ID number listed right under your sandbox company’s name, with a copy icon next to it)minorversion→65(or leave whatever default the collection already ships with)
Click on each variable name inside the URL bar to edit it directly, or set them all at once on the collection’s Variables tab.
Then, on this request’s own Authorization tab, open the Token dropdown and select the token you generated in Step 4 (it should already show your token name with an expiry countdown and a Refresh link). If it’s not selected, that’s the field the actual bearer token needs to land in, everything else on this tab (Auth URL, Access Token URL, Client ID, Client Secret) is inherited from the collection and doesn’t need to be touched per-request.
Hit Send. A real request against your sandbox company should come back 200 OK with a full Profit and Loss JSON report, Net Income, Interest Expense, Depreciation, Amortization, and every other P&L line, the exact same numbers we pulled by hand in Part 1, now available on demand instead of via a manual export.
If you’d rather test from a terminal than Postman, the same request as curl looks like this (swap in your own Realm ID and access token):
curl "https://sandbox-quickbooks.api.intuit.com/v3/company/{realmId}/reports/ProfitAndLoss?minorversion=65" \
  -H "Authorization: Bearer {accessToken}" \
  -H "Accept: application/json"
Step 6: Use AI to sanity-check the request and read the response
This is where an AI assistant earns its keep twice over. First, while you’re building the request: if Postman comes back with an error (a wrong scope, an expired token, a malformed URL), paste the error message and your request setup into Claude and ask it to diagnose it, this is faster than digging through Intuit’s docs line by line.
Second, once you get a real response back, that JSON is deeply nested and not exactly readable at a glance. Paste it into Claude with a prompt like:
“Here’s the JSON response from the QuickBooks ProfitAndLoss report endpoint. Find Net Income, Interest Expense, Depreciation, and Amortization, and lay them out the same way we did by hand in Part 1 of this series, so I can confirm the API is returning the same numbers.”
If the numbers match what you calculated manually in Part 1, you’ve confirmed the connection is pulling the right data, and you’re one step from automating the whole thing.
Why these credentials need to be treated like a password
Here’s the part that’s easy to skim past when you’re excited to see a 200 response: your Client Secret, access token, and refresh token are, functionally, the keys to your QuickBooks data. Anyone who has them can call the API as if they were you, read every invoice, customer, and financial report in the connected company, and (because the scope is read/write) create or change records too. Intuit’s own token rules make this even more worth taking seriously: refresh tokens issued now stay valid for up to five years, so a leaked one doesn’t just cause a bad afternoon, it can cause years of exposure if nobody notices.
A few rules worth following, whether you’re testing in the sandbox or eventually connecting a live company:
- Never commit credentials to git, and never paste them unblurred anywhere public (a screenshot, a support forum post, a shared doc). If you’re following along and taking your own screenshots, blur out most of the Client Secret and both tokens, leaving just enough visible to show the format, the way we did above.
- Keep Development and Production credentials completely separate. They already can’t be swapped by accident (Intuit blocks that), but don’t store them side by side in the same unsecured note either.
- Store real credentials in environment variables or a password manager, never hardcoded in a script, a plain text file, or a Postman collection you might share later.
- Rotate or disconnect the app in the Intuit Developer dashboard once you’re done testing, if you’re not moving straight into building something with it.
On the read-only question specifically: if you were hoping to grab a safer, read-only version of this key, the honest answer is that QuickBooks Online’s Accounting API doesn’t offer one. The single scope (com.intuit.quickbooks.accounting) is full read/write, there’s no flag or checkbox that limits an app to reports only. The two real ways to get read-only behavior in practice are (1) have your own code simply never call a write endpoint, even though the token technically permits it, or (2) if you’re on QuickBooks Online Advanced, connect the app as a restricted QuickBooks user (a Reports-only or custom role) rather than the Primary Admin, so the human account behind the connection is limited even if the API scope isn’t. Neither is as clean as a true read-only key, but both meaningfully shrink what a leaked credential could actually do.
Next in this series
Part 3: Building your own EBITDA dashboard, taking this working connection and turning it into something you can actually look at: a date-range picker, EBITDA and margin calculated automatically, and a trend line over time.
If you’d rather skip straight to a working, secured dashboard instead of managing your own tokens and Postman collections, that’s exactly what we build, see our IT consulting in Houston or book a discovery call and tell us which numbers you want on demand.