

This is Part 4 of a series on getting your EBITDA out of QuickBooks, from a number you calculate by hand to a live dashboard you can pull any time.
- What EBITDA is and how to get it from QuickBooks
- Connecting and testing the QuickBooks API
- Building your own EBITDA dashboard
- Sharing your dashboard with your team, you’re here.
Here’s where the series left off. Part 3 ended with a working dashboard, a real chart, real math, running on one laptop against a fake sandbox company. That’s a great prototype. It’s also not something your leadership team can open, because it lives on your machine, on localhost, talking to data that doesn’t exist.
Getting from there to “the whole team can open this and see real numbers” is two build steps and, in our case, one gotcha that ate the rest of the afternoon. Same as Part 3, Claude did the actual work here, clicking through hosting settings, reconfiguring the Intuit developer portal, writing and running the diagnostic scripts. Our job was to describe what “done” looked like, watch what it found, and sanity-check the result before trusting it, the same discipline from every article in this series, just aimed at infrastructure instead of a P&L this time.
What actually changes going to production
Quick orientation, because “production” means more than one thing here:
- Hosting. The app needs to live somewhere reachable by a URL, not
localhost, and it needs to stay running. - HTTPS, always. A dashboard that touches financial tokens has no business accepting plain
http://. - A password gate, at minimum. Your dashboard doesn’t need a full user-accounts system on day one, but it does need something between it and the open internet. A shared password checked on every request is a reasonable starting point for a small internal tool. It’s not the ideal, though: it can’t tell one team member from another, and it can’t be revoked for one person without changing it for everyone. If this dashboard is going to more than a couple of people, per-user logins, or better, single sign-on through whatever your company already uses (Microsoft 365, Google Workspace), is worth setting up properly rather than leaning on one shared password long-term.
- Production QuickBooks keys, on your real company. Production isn’t just “Development with different keys.” Several settings live only on the Production side of your Intuit developer app, and if you only configured them for Development while building in Part 3, Production silently doesn’t have them.
Step 1: Build out hosting
We put ours on an Azure Web App, but any always-on host works the same way. Two settings matter more than they get credit for:
- HTTPS Only, turned on. Most hosts let plain
http://through by default unless you explicitly say not to. On Azure this is a single toggle in the app’s TLS/SSL settings, confirm it’s on rather than assuming it is. - Always On, turned on. Without it, a lot of hosts will spin your app down after a period of no traffic and take several seconds to wake back up on the next request, which is a rough first impression for anyone opening the dashboard cold. Always On keeps it warm.
If you’re repurposing an existing host rather than starting fresh, this is also the moment to check whether it has any leftover network restrictions from its previous life, an old IP allowlist, a firewall rule, anything that would quietly block traffic before it ever reaches your app.
Step 2: Get production keys
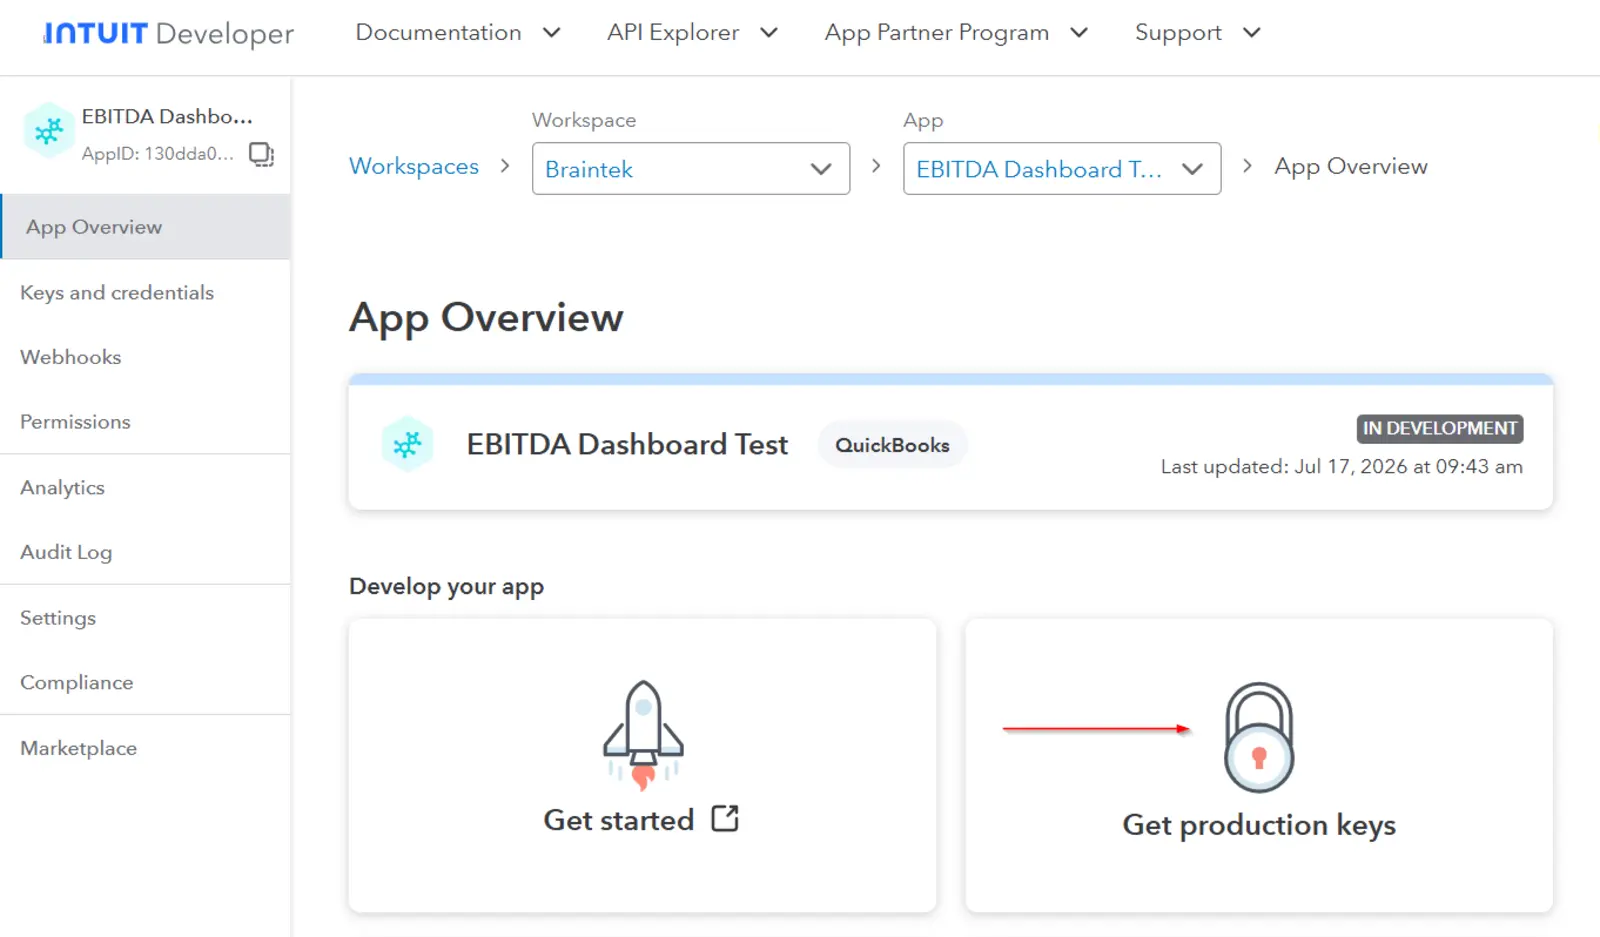
In your app on the Intuit developer portal, requesting production credentials is one click, and it shows you a real Client ID and Client Secret immediately. That can trick you into thinking you’re done, it isn’t quite that simple.
Underneath, Intuit tracks a readiness checklist, app details, a compliance questionnaire, meant for apps going on the public QuickBooks App Store.
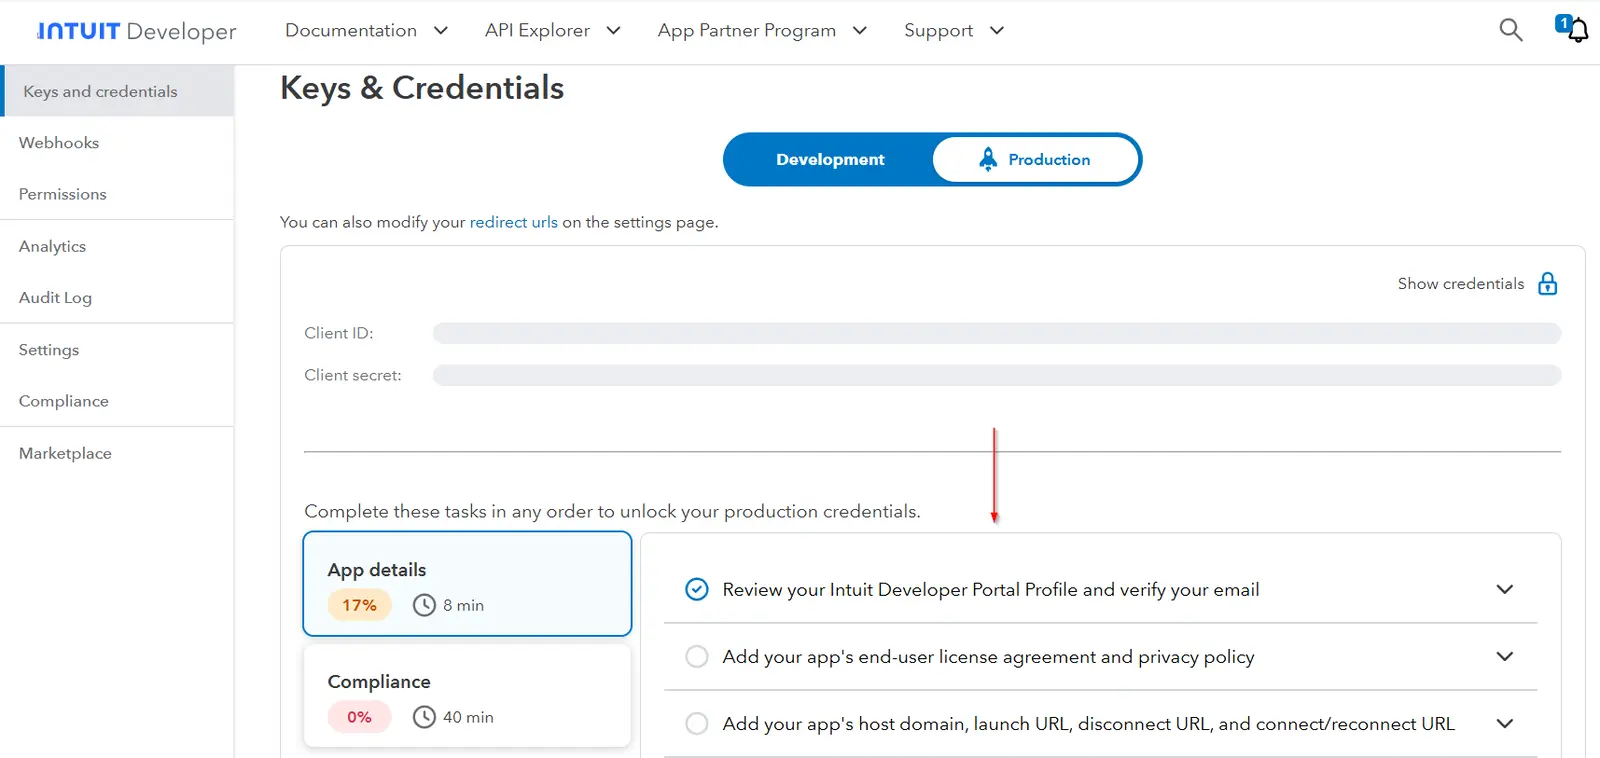
If you’re connecting your own company rather than publishing publicly, that checklist mostly doesn’t block you, ours turned out to already be submitted and approved from an earlier pass. Fill out what Intuit actually requires for your use case, and don’t get pulled into App Store listing details you don’t need yet.
Two more settings need attention here, both tracked separately for Development and Production even though they live under the same app:
- App URLs. Host domain, launch URL, disconnect URL, connect/reconnect URL. Ours had generic placeholder values on the Production side, left over from initial app setup. Go through each field with the Production toggle selected and confirm every one points at your real hosted app.
- Redirect URI. Back in Part 3 we registered
http://localhost:3000/callbackunder Development, which is what made the sandbox flow work. Production has its own, separate redirect URI list, and ours had never gotten the real production callback address added to it.
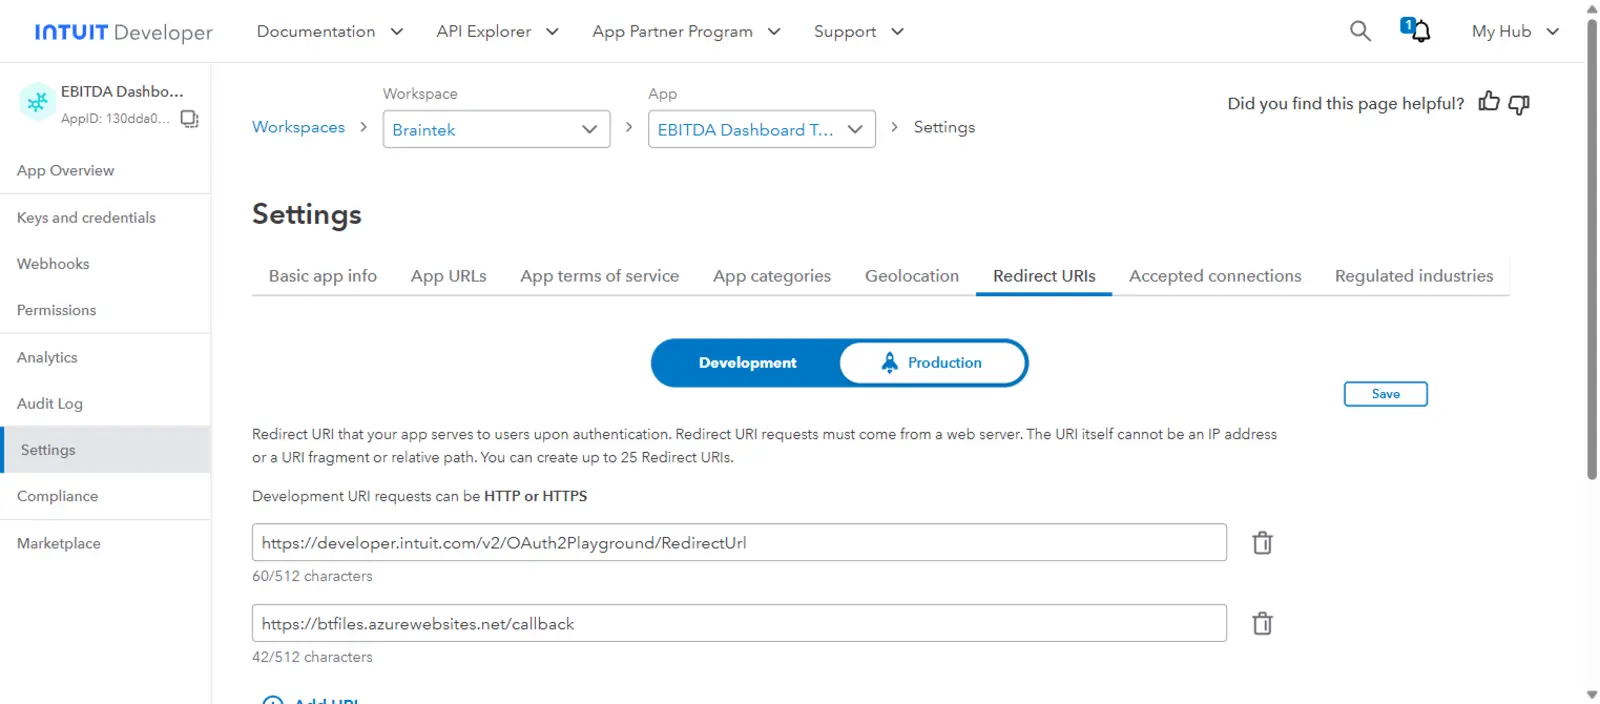
Same rule as always: the address in Intuit’s settings has to match your app’s real callback URL character for character, checked against the Production tab specifically.
Gotcha: the error message won’t tell you what’s actually wrong
Here’s the frustrating part. Even after hosting was solid and Step 2 was fully filled out, clicking Connect still failed, with the same generic message every time:
“Uh oh, there’s a connection problem. Sorry, but undefined didn’t connect.”
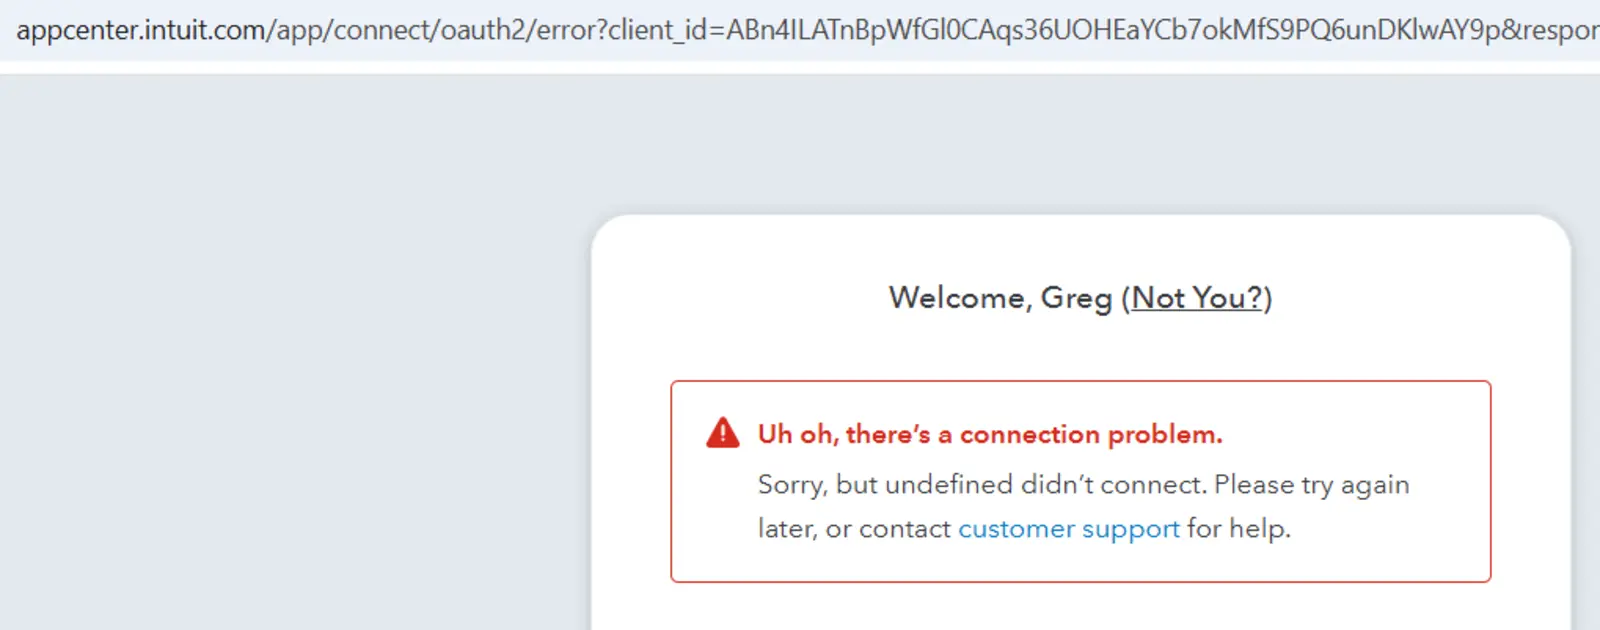
That message doesn’t name a cause. It doesn’t distinguish a bad redirect URI from an unconfigured App URL from a wrong Client ID. It’s the same page no matter what’s actually broken, which means you have to isolate the failure yourself rather than trust the error to point at it.
The move that actually works: test your own callback directly, bypassing Intuit’s authorize page entirely. Hit your app’s /connect route yourself to get it to generate a real, freshly-issued state value (your app logs or briefly shows this). Then call your app’s /callback route directly with that real state plus a made-up authorization code. Two outcomes tell you two different things:
- If your app correctly rejects a mismatched state (one you didn’t just get from
/connect), that confirms your CSRF protection is working. - If, with the real state, your app gets far enough to attempt a real token exchange with Intuit, and the error that comes back is something specific like
invalid_grant/ “Invalid authorization code,” rather thaninvalid_client, that’s Intuit telling you it recognized your Client ID and Secret and only rejected the fake code. In other words: your app and your credentials are fine. The real failure is happening earlier, on Intuit’s own authorize page, before it ever redirects back to you with a genuine code.
That single test told us the bug wasn’t in our code, or even in the Intuit settings we’d already fixed. One thing was left to check: does the Client ID our app is actually sending match, character for character, what Intuit’s portal shows for this app? This is the point in the afternoon where having Claude do the digging actually mattered, it ran the isolation test, read the portal, and wrote the comparison script without getting tired or starting to skim, which is exactly the failure mode that let the typo hide in the first place.
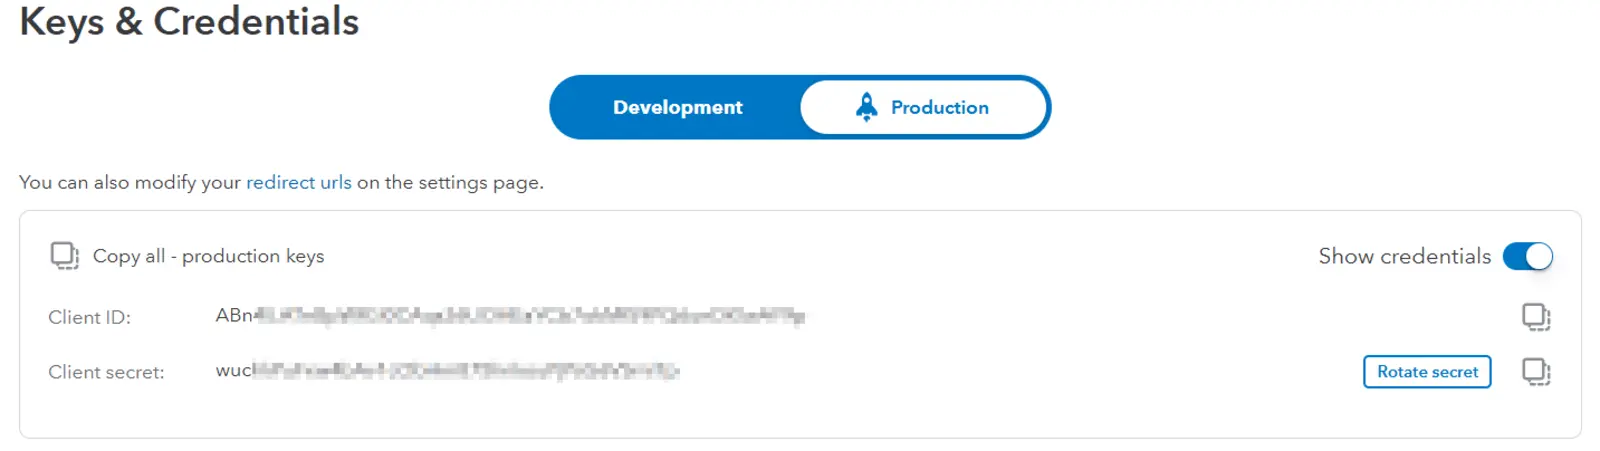
It didn’t. Buried in the middle of a 50-character random string was one character that didn’t match: our app had a lowercase l, Intuit’s portal showed an uppercase I. On screen, in the font both were rendered in, those two characters are close to indistinguishable, which is exactly how the typo got in and exactly how it survived being looked at directly more than once.
The only way to actually catch this is to stop looking at it, and diff the two strings programmatically, character by character, comparing character codes rather than rendered glyphs:
const a = "...yourAppsValue...";
const b = "...portalsValue...";
for (let i = 0; i < Math.max(a.length, b.length); i++) {
  if (a[i] !== b[i]) {
    console.log(`DIFF at ${i}: "${a[i]}" (${a.charCodeAt(i)}) vs "${b[i]}" (${b.charCodeAt(i)})`);
  }
}
That’s a two-second script, and it’s the only method that can’t be fooled by an ambiguous font. It found exactly one difference, at exactly one position. Once the Client ID was corrected to match Intuit’s portal exactly, the connection worked on the very next attempt.
Where it probably came from: credentials get copied from a portal into an .env file, sometimes by hand, sometimes across a couple of tools, and a visually-identical character swap is an easy, silent way for that copy to go slightly wrong. There’s nothing to debug in the logic, the string is just wrong, which is exactly why “read the code” doesn’t catch it, and “compare the characters” does. If your own connection ever fails with a similarly vague error after everything else checks out, run that diff early rather than last, it would have saved us the most time here.
Connect to QBO, and here’s our data
With hosting solid, Step 2 fully configured, and the Client ID corrected, the dashboard connects cleanly to our real QuickBooks company, over HTTPS, behind a password, reachable by anyone on the team with the link, not just the laptop that built it.
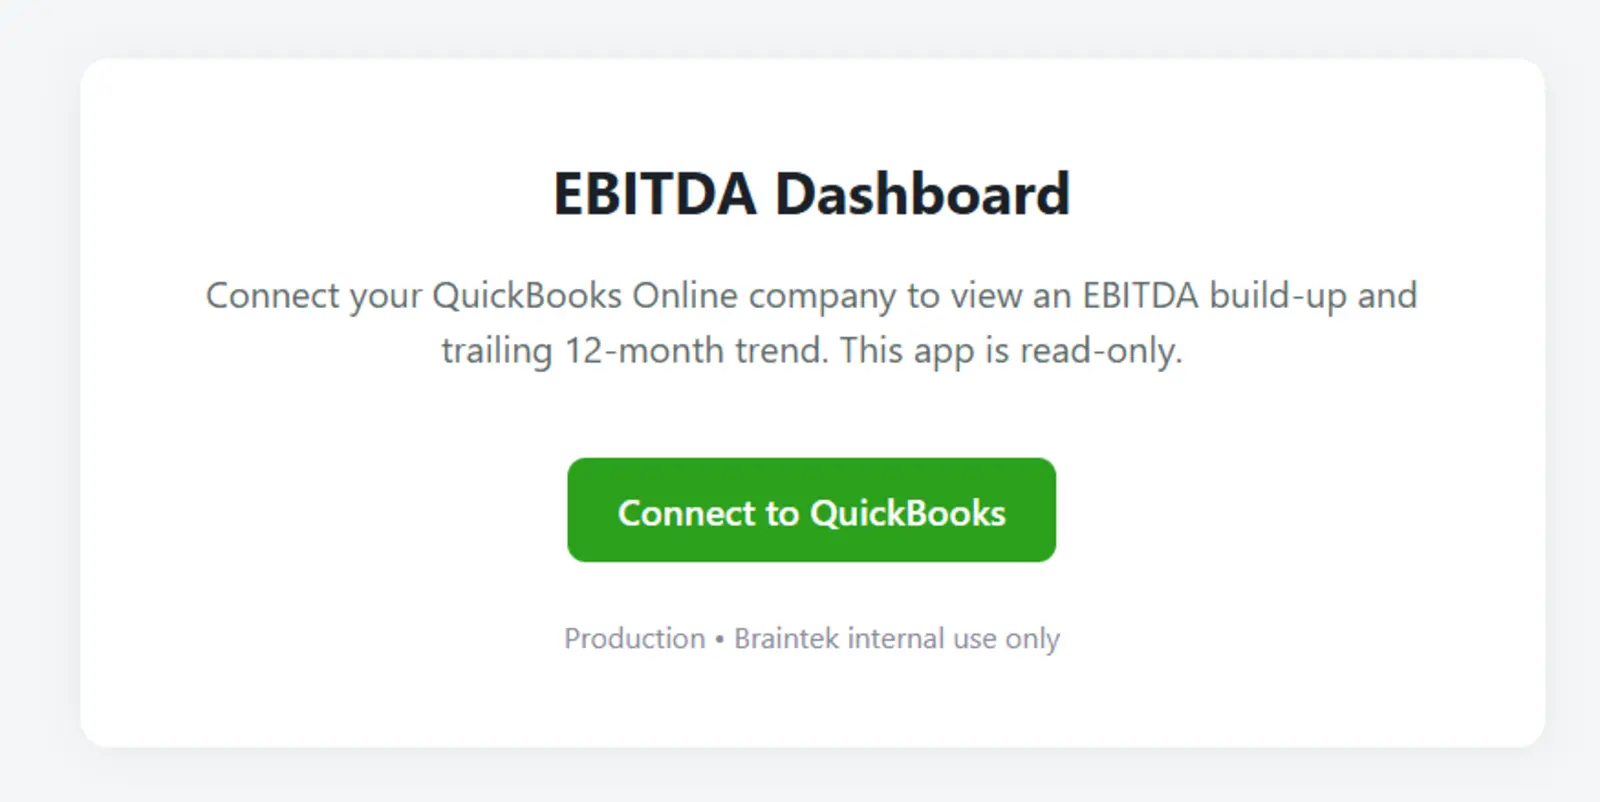
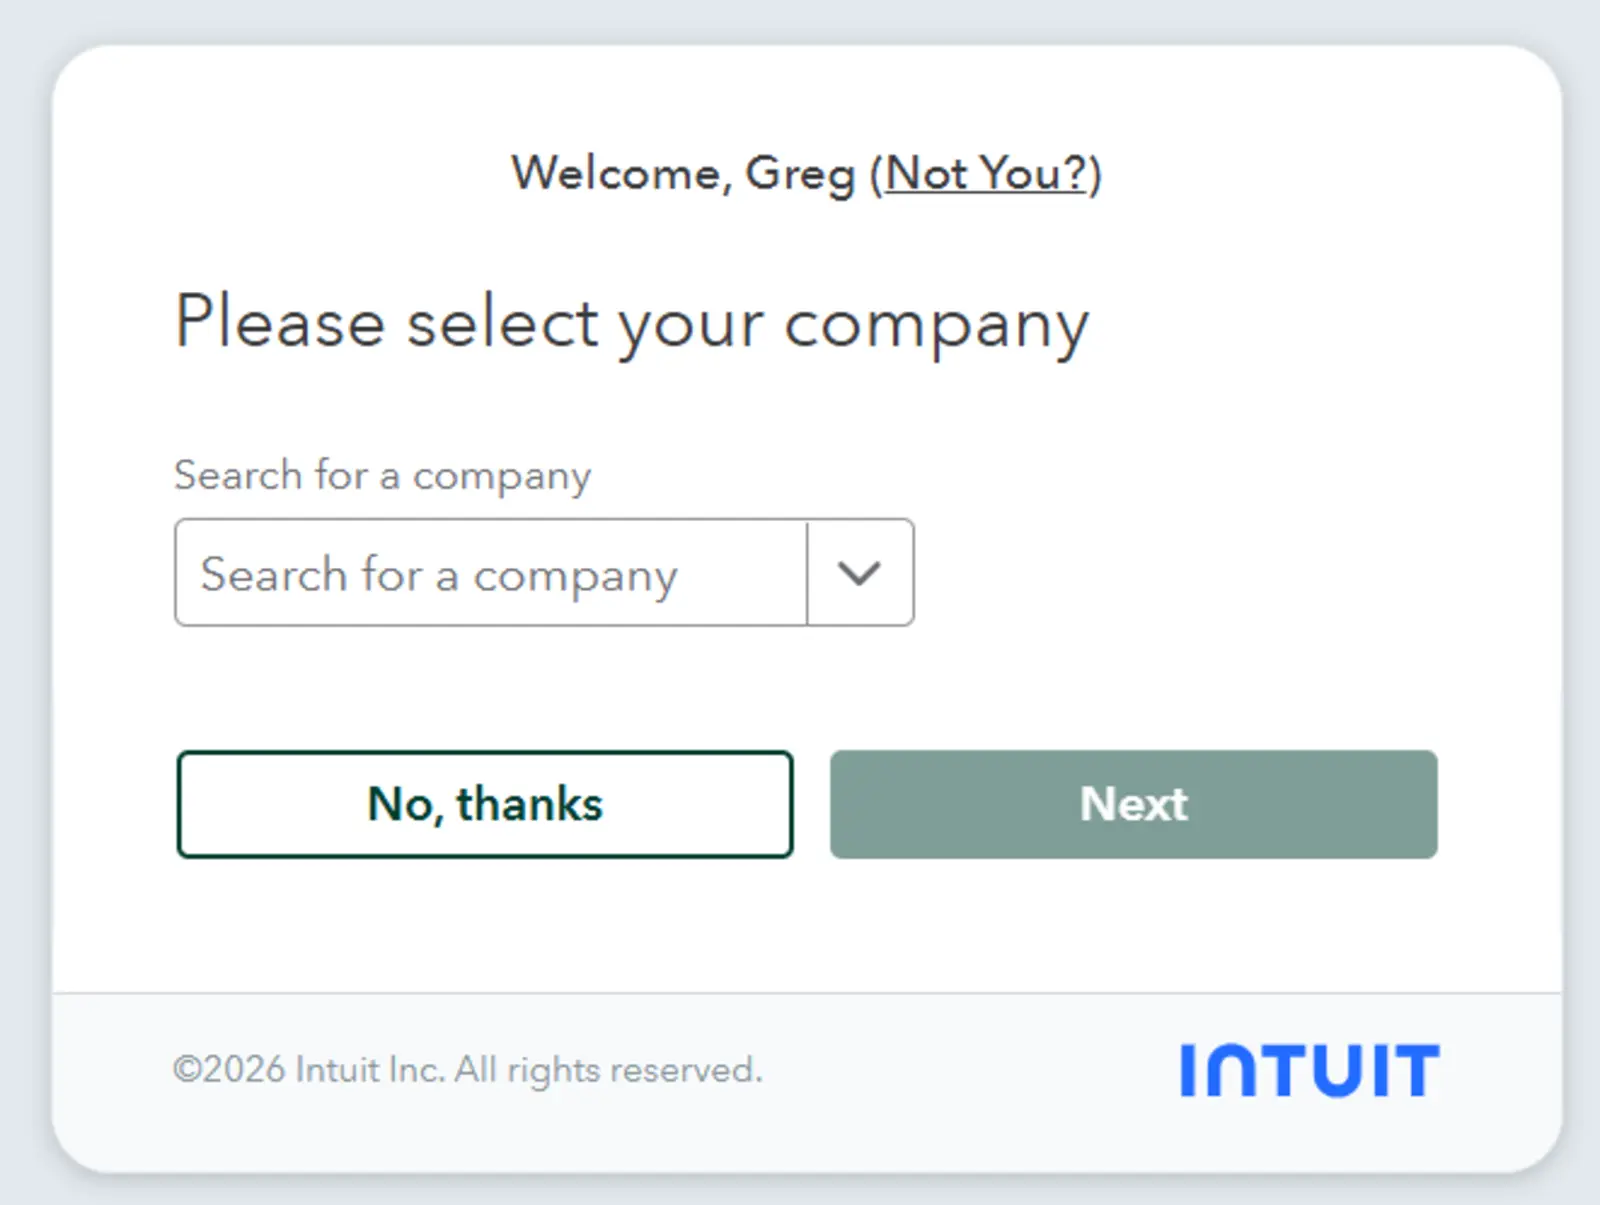
Clicking Connect now runs the full flow, real sign-in, real company picker, no error page:
And the dashboard itself renders real add-back rows and a real margin, on demand, for whichever date range you pick, no spreadsheet, no export, no waiting on an accountant. (The figures below are illustrative, not our actual numbers, the point is that the build-up, the math, and the layout all come from Part 1 and Part 3, just running live now instead of by hand.)
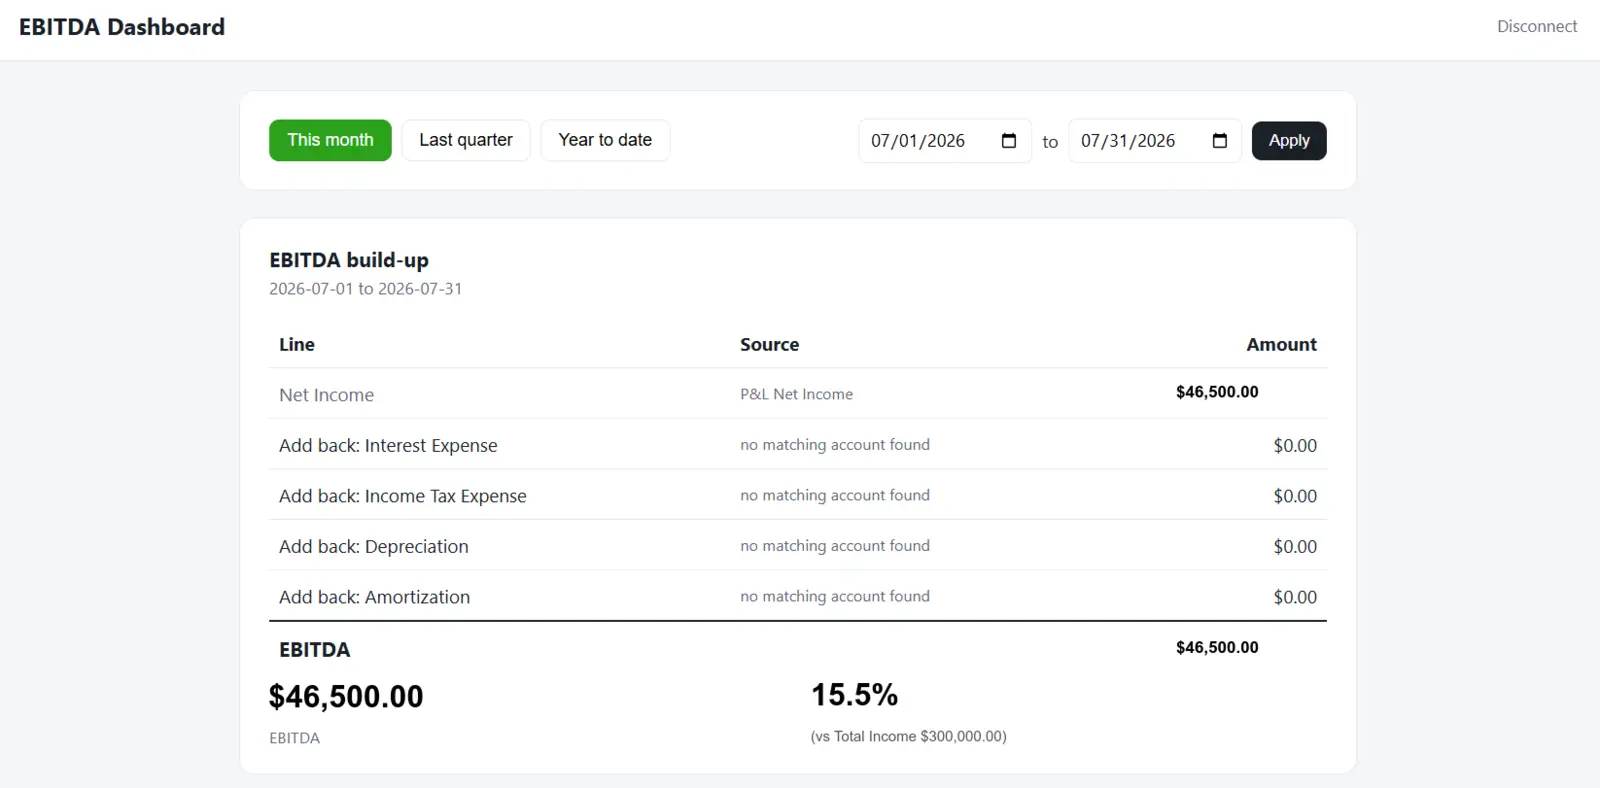
The math is exactly what Part 1 taught you to do by hand and Part 3 automated, now running against real numbers, for real people, on demand.
If you’d rather skip straight past the character-by-character debugging and have hosting, HTTPS, production credentials, and a real connection set up correctly the first time, that’s squarely what we do. See our IT consulting in Houston or book a discovery call and tell us which numbers you want your whole team looking at.